How to use ego (lite) with Local model
This tutorial walks you through connecting and using ego (lite), from local model setup to browser operation.
This tutorial shows how to control ego (lite) with a local model, using Qwen3.8 27B and OpenCode as an example. You can also use other AI coding platforms or your own Agent Harness with other local models that support tool calling. The platform can use this browser workflow as long as it can load the ego-browser skill and execute commands on the computer where ego (lite) is installed.
Before you start: prepare the software
This tutorial uses the Mac versions. Set up these three applications on the same Mac:
- Download and open the ego (lite) DMG.
- Follow the instructions and double-click the ego (lite) icon to install.
- Open ego (lite) and finish onboarding.
- Fully quit OpenCode, including any running TUI session, and reopen it. Opening a new chat alone is not a full restart.
Onboarding installs the ego-browser skill in ~/.agents/skills/. Fully restarting OpenCode makes it read the available skills again. Look for /ego-browser in the skill-loading step later in this guide.
Keep Ollama running, open Terminal, and run:
ollama list
Continue once a model list appears; it can be empty before you download a model. If ollama is not found, finish Ollama's CLI setup and reopen Terminal. If it cannot connect to the service, open the Ollama application.
Two ways to configure the local model
You can follow the steps yourself or ask an AI assistant that already works to help. With manual setup, you download the model, set its context length, and add the OpenCode configuration. With AI-assisted setup, send the provided prompt to your assistant and complete any actions it asks you to handle. Choose either path, then continue to “Select the local model in OpenCode.”
Path 1: Configure it manually
1. Download the model
Run these commands in Terminal, waiting for the download to finish:
ollama pull qwen3.8:27b
ollama list
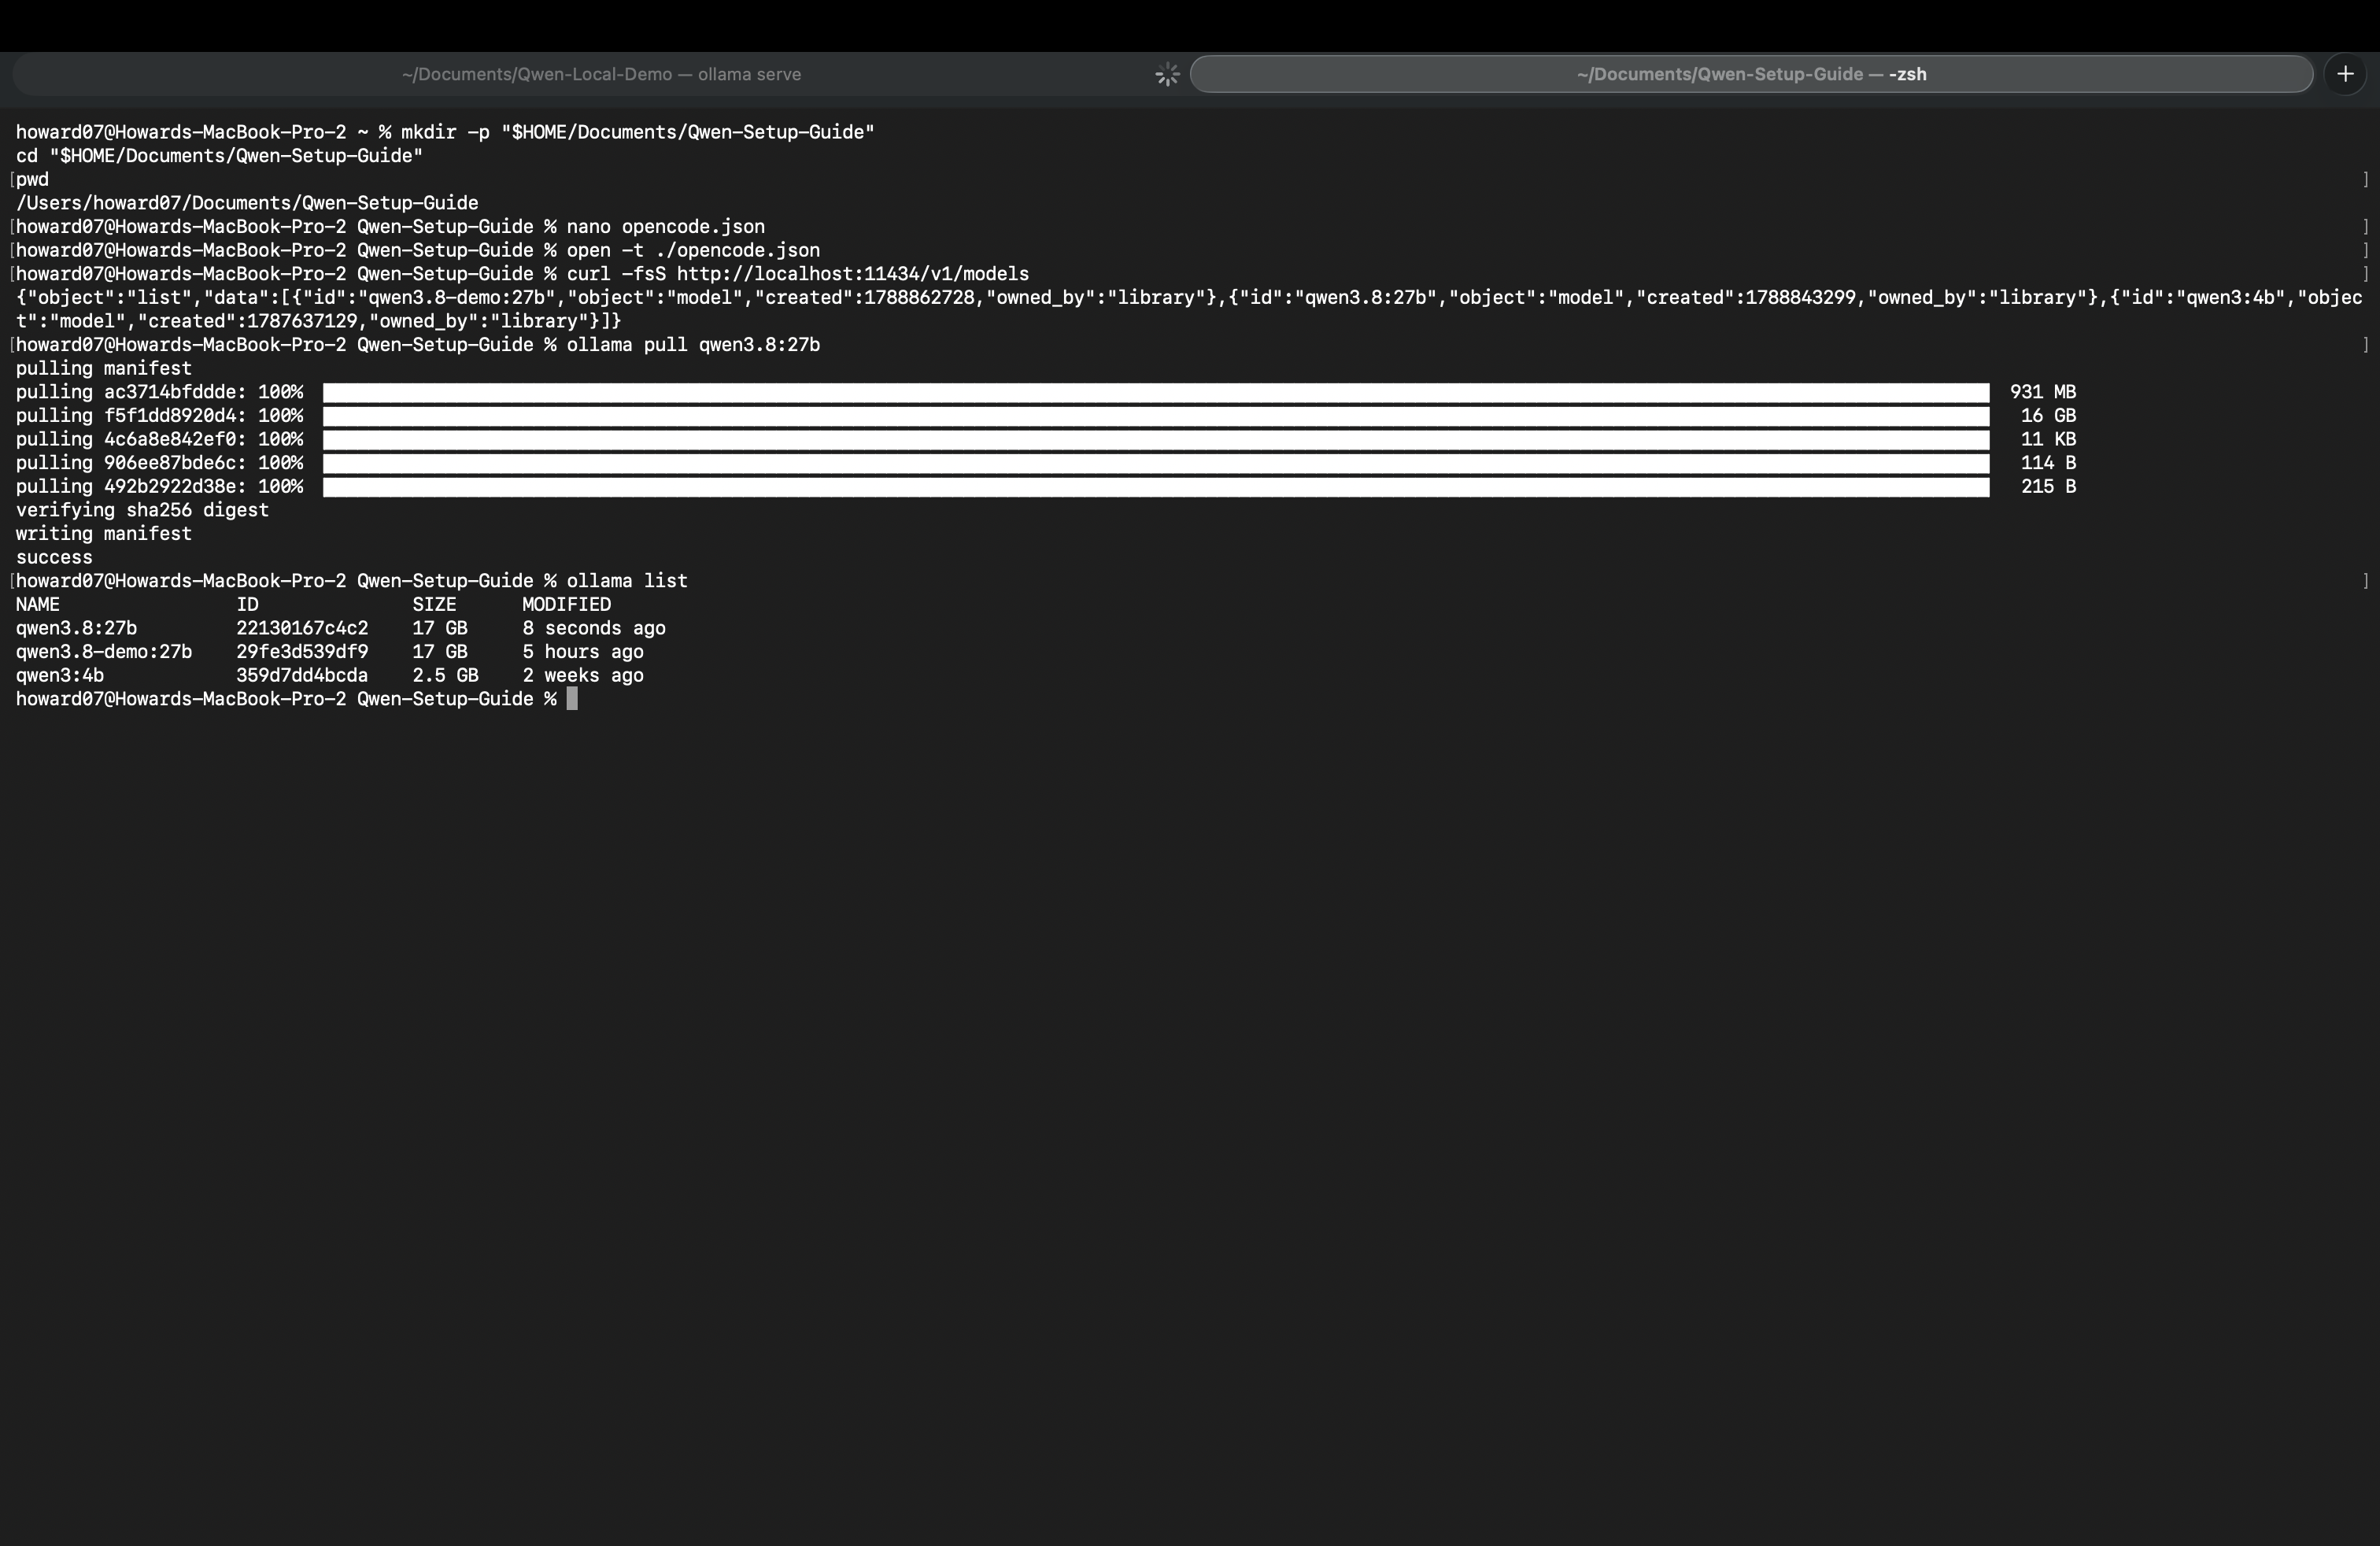
The list should contain qwen3.8:27b. The Ollama model listing identifies this as a Q4_K_M model with an approximately 18 GB download. Running it also needs memory for the context and other applications.
2. Set Ollama's context length
Open the Ollama application's settings and set the context length to 64k or higher. This follows the 64k starting point required by Ollama's OpenCode integration instructions. Make sure your computer has enough available memory.
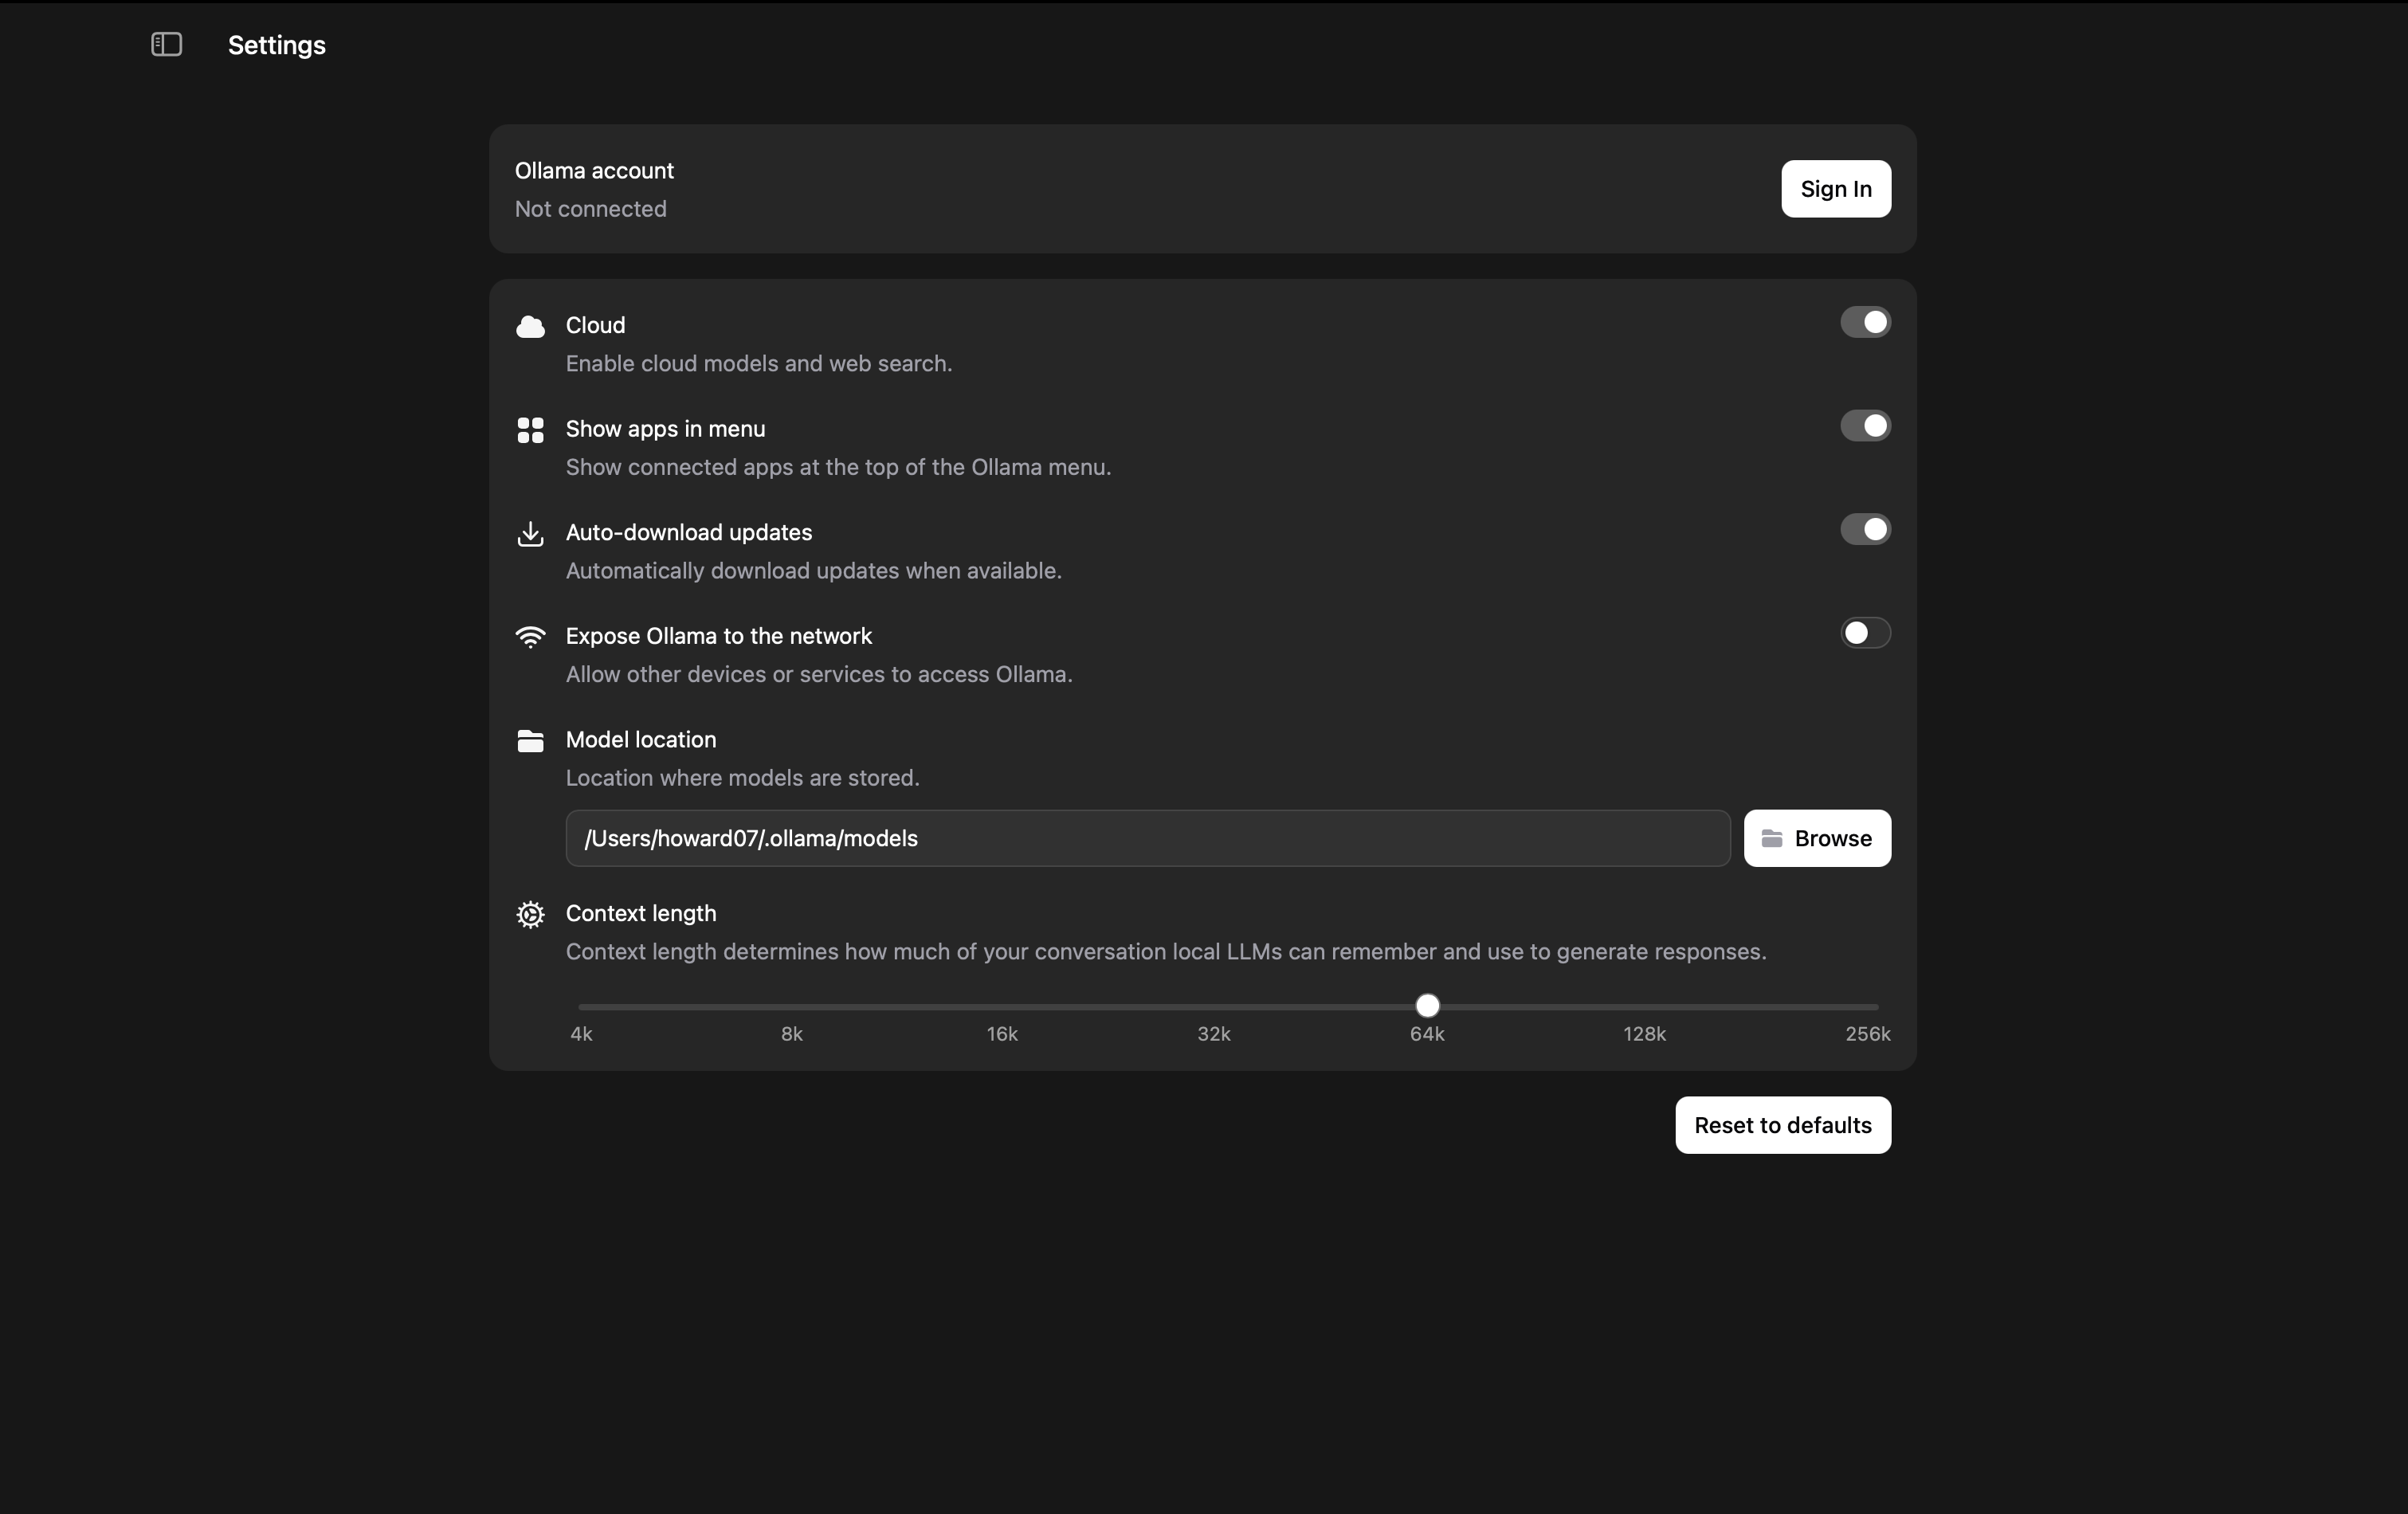
If you installed only the Ollama CLI, follow the official context-length instructions and set the value when starting the service:
OLLAMA_CONTEXT_LENGTH=65536 ollama serve
This is an alternative to running the application, not an additional service to run alongside it. If an existing Ollama service occupies the port, quit it normally first. Leave this terminal window open and run subsequent commands in another window.
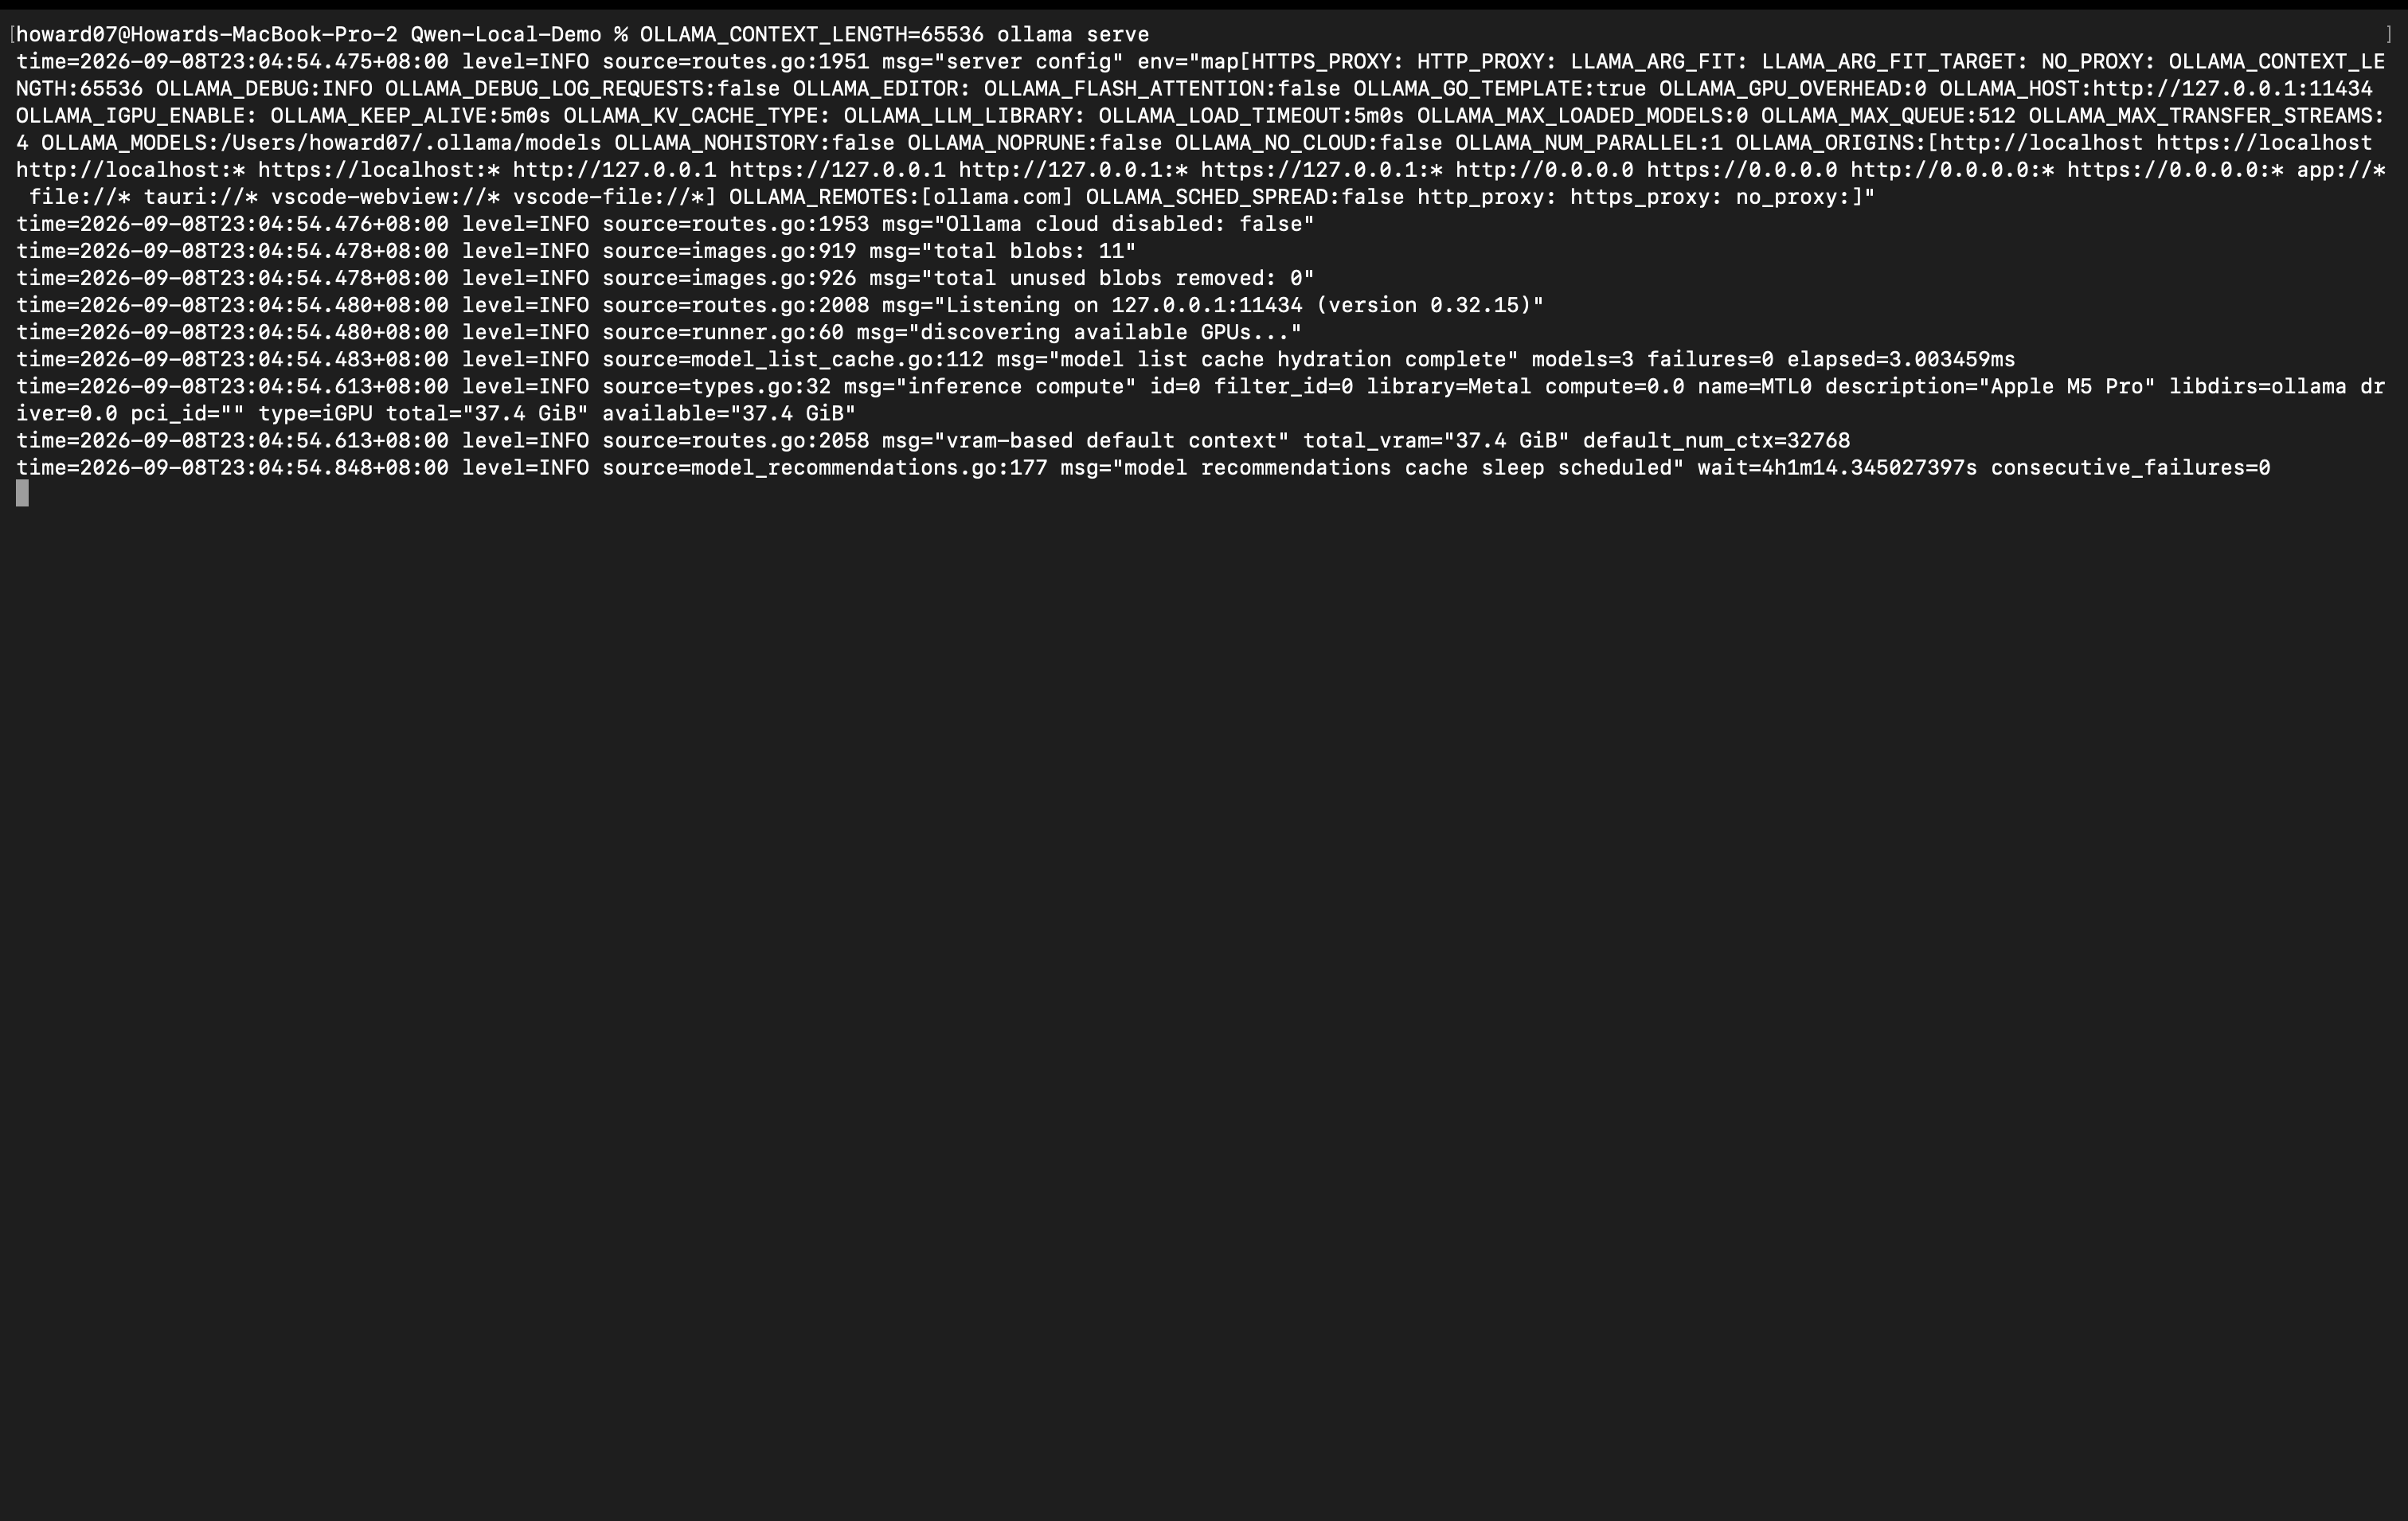
3. Create a project folder
These commands create a Qwen-Setup-Guide folder in your Documents directory and enter it:
mkdir -p "$HOME/Documents/Qwen-Setup-Guide"
cd "$HOME/Documents/Qwen-Setup-Guide"
pwd
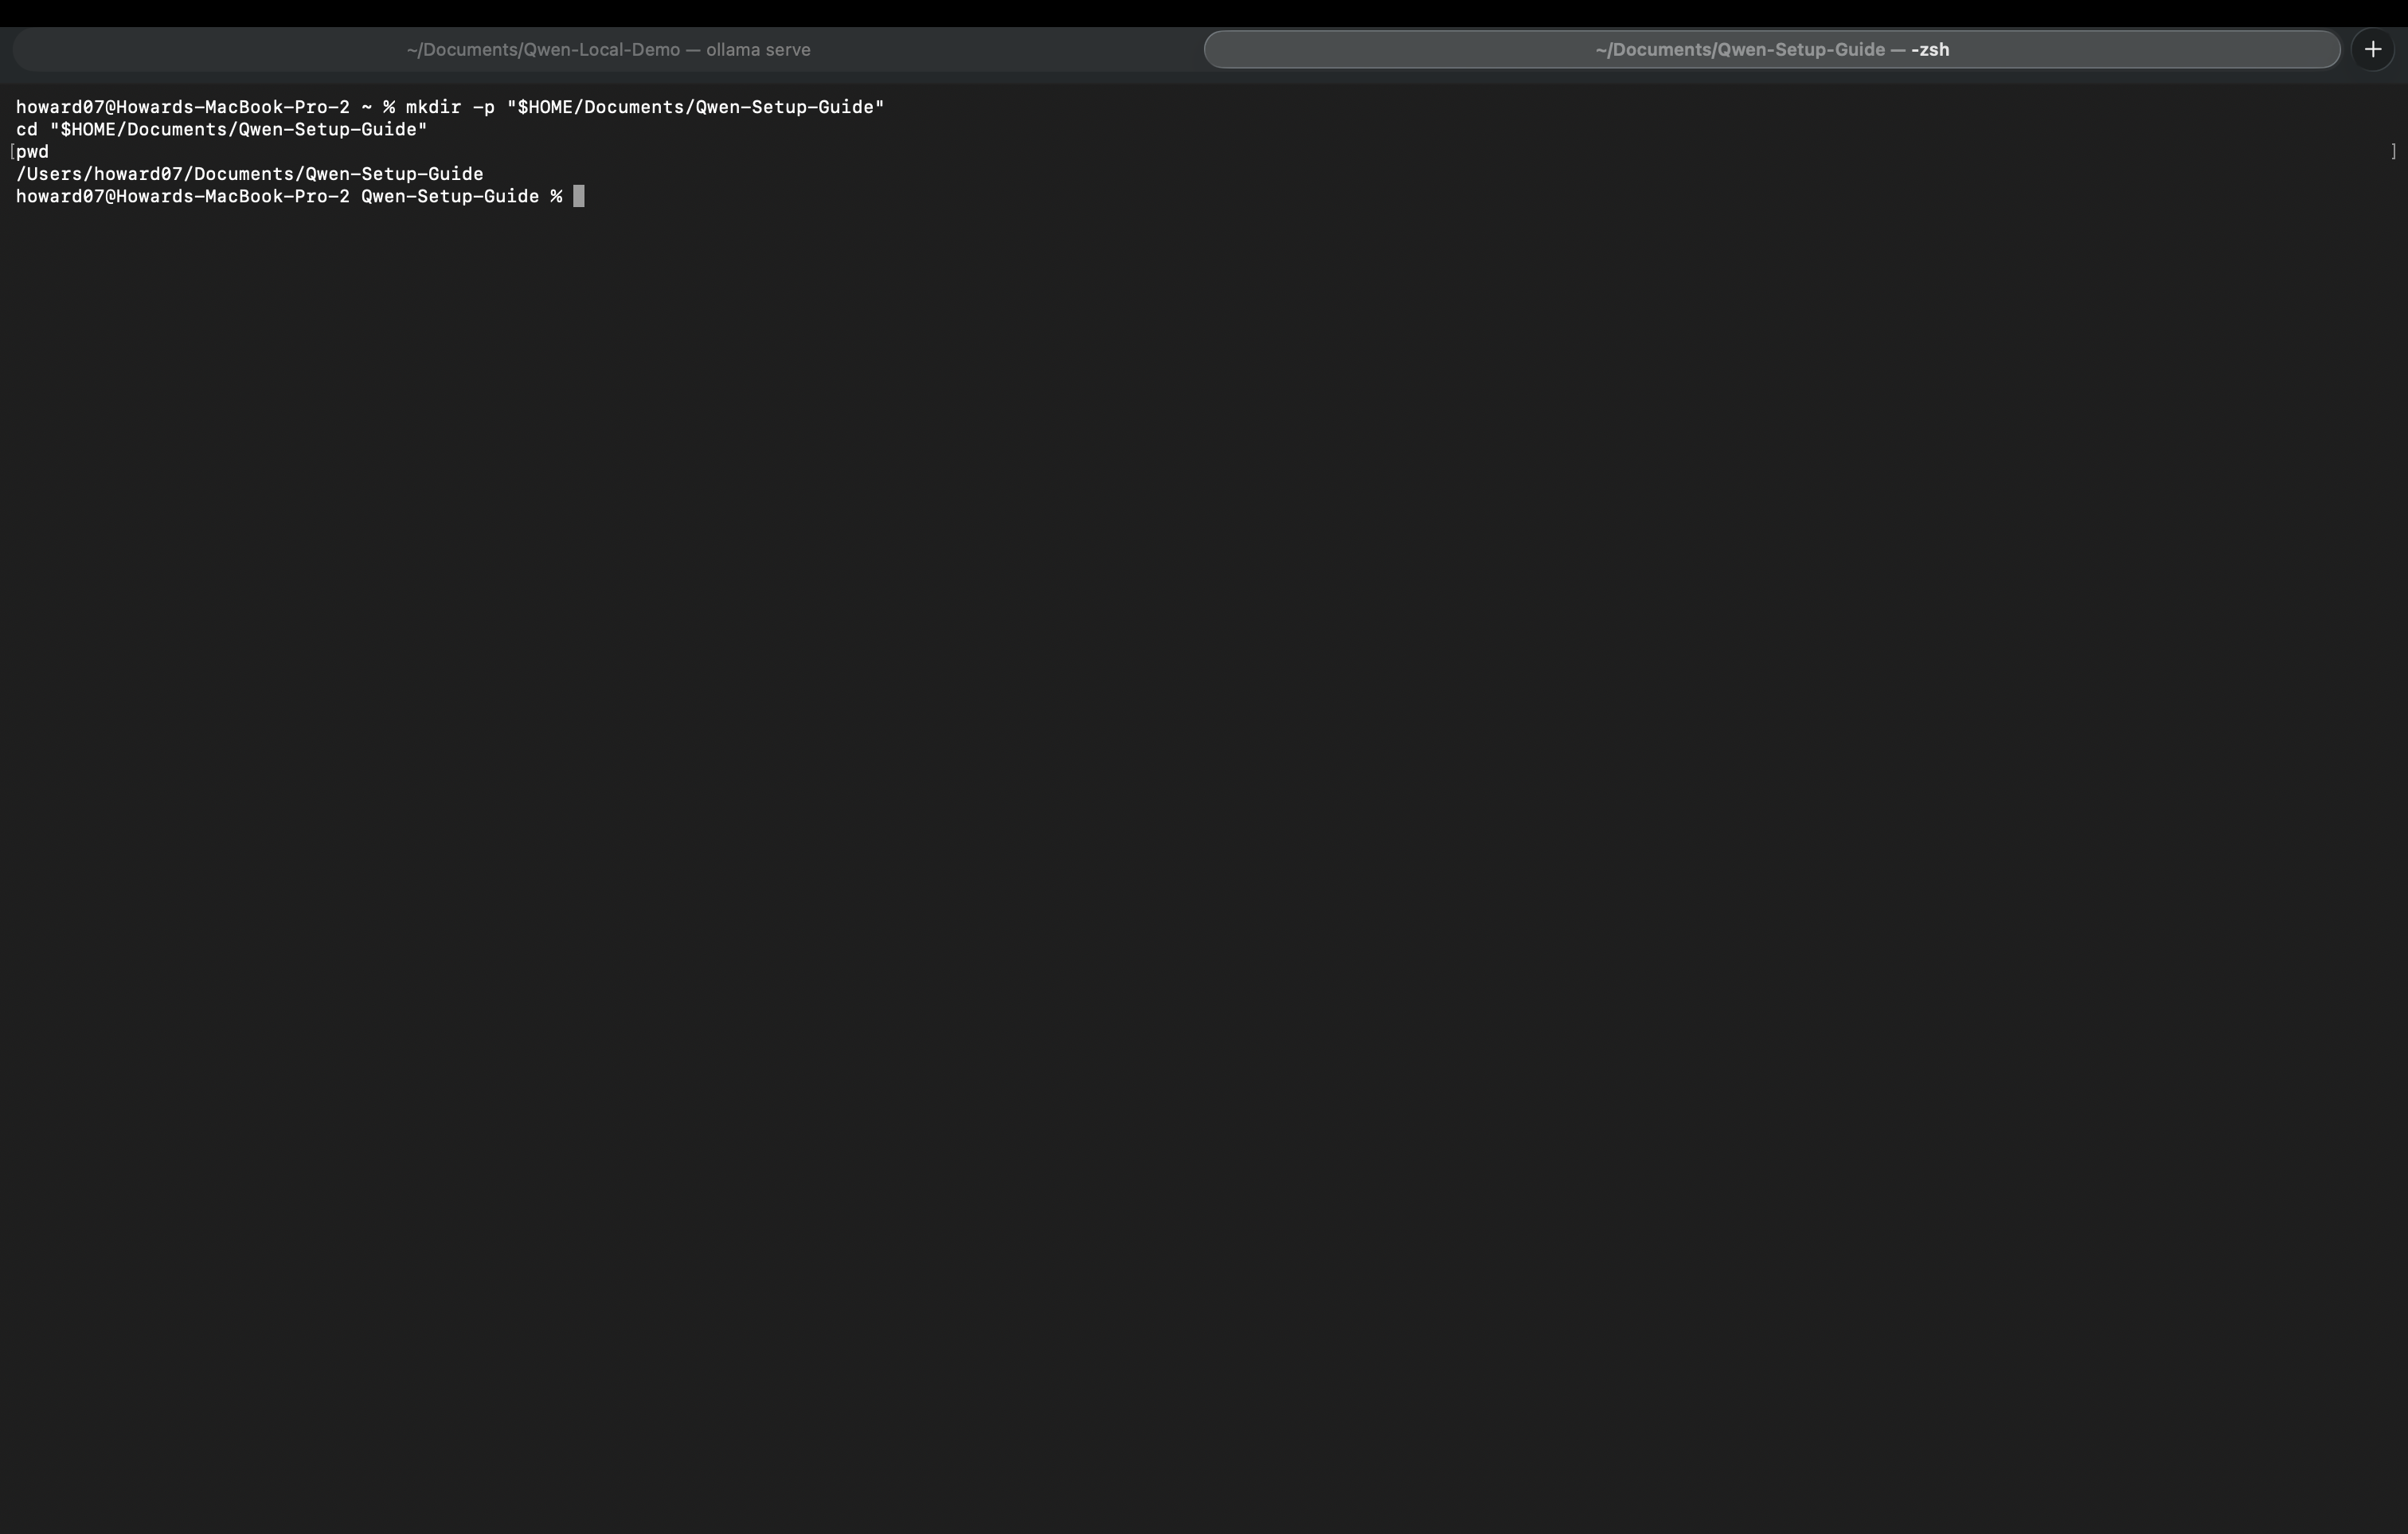
Save the configuration files here. You can use your own project folder instead, as long as you keep using the same folder in the steps that follow.
4. Add the OpenCode configuration
Following OpenCode's project configuration instructions, place opencode.json in the project root.
If the folder already contains opencode.json or opencode.jsonc, back it up and merge the corresponding fields. Preserve unrelated settings and do not create a conflicting configuration file. The following example creates a new opencode.json.
From the project folder, run:
nano opencode.json
Paste the following into the editor:
{
  "$schema": "https://opencode.ai/config.json",
  "model": "ollama/qwen3.8:27b",
  "small_model": "ollama/qwen3.8:27b",
  "provider": {
    "ollama": {
      "npm": "@ai-sdk/openai-compatible",
      "name": "Ollama",
      "options": {
        "baseURL": "http://localhost:11434/v1"
      },
      "models": {
        "qwen3.8:27b": {
          "name": "Qwen3.8 27B"
        }
      }
    }
  }
}
Press Control + O, then Enter to save, followed by Control + X to exit. The filename must be opencode.json, without an extra .txt extension.
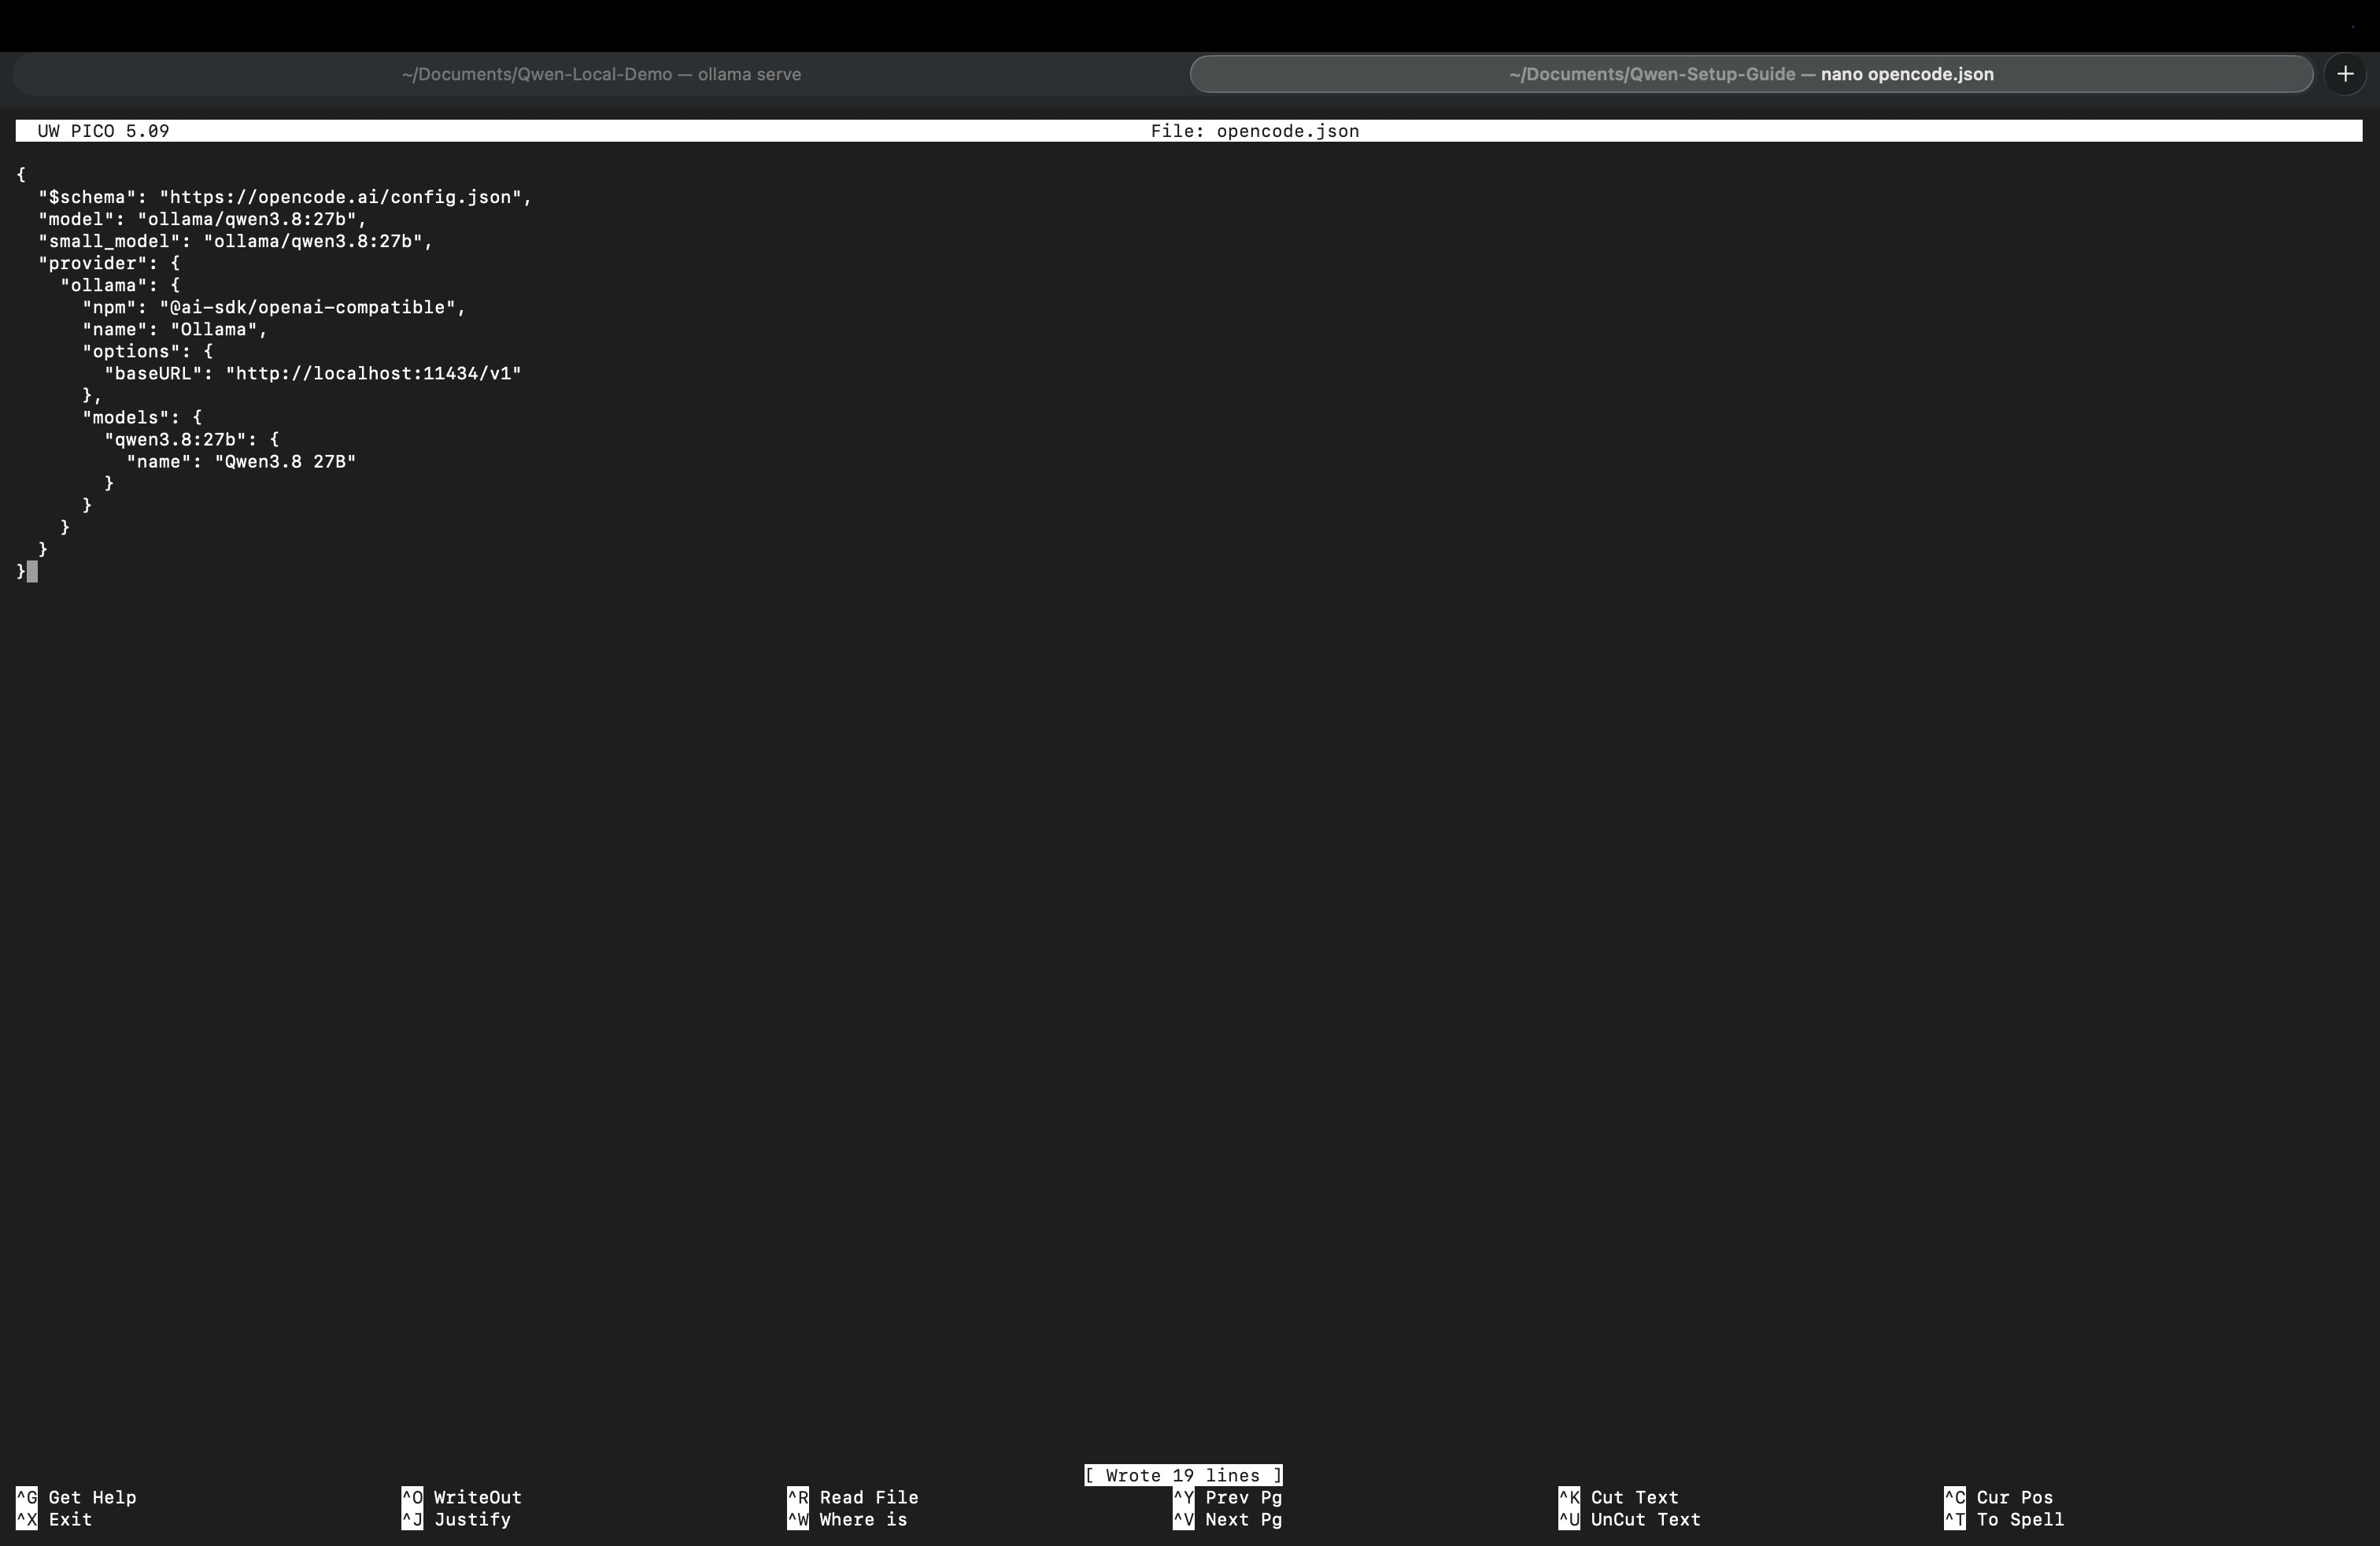
This follows the official provider example, substituting qwen3.8:27b as the model. model sets the default model and small_model sets the model for lightweight tasks; both use local Qwen here. Connecting to local Ollama does not require a cloud API key.
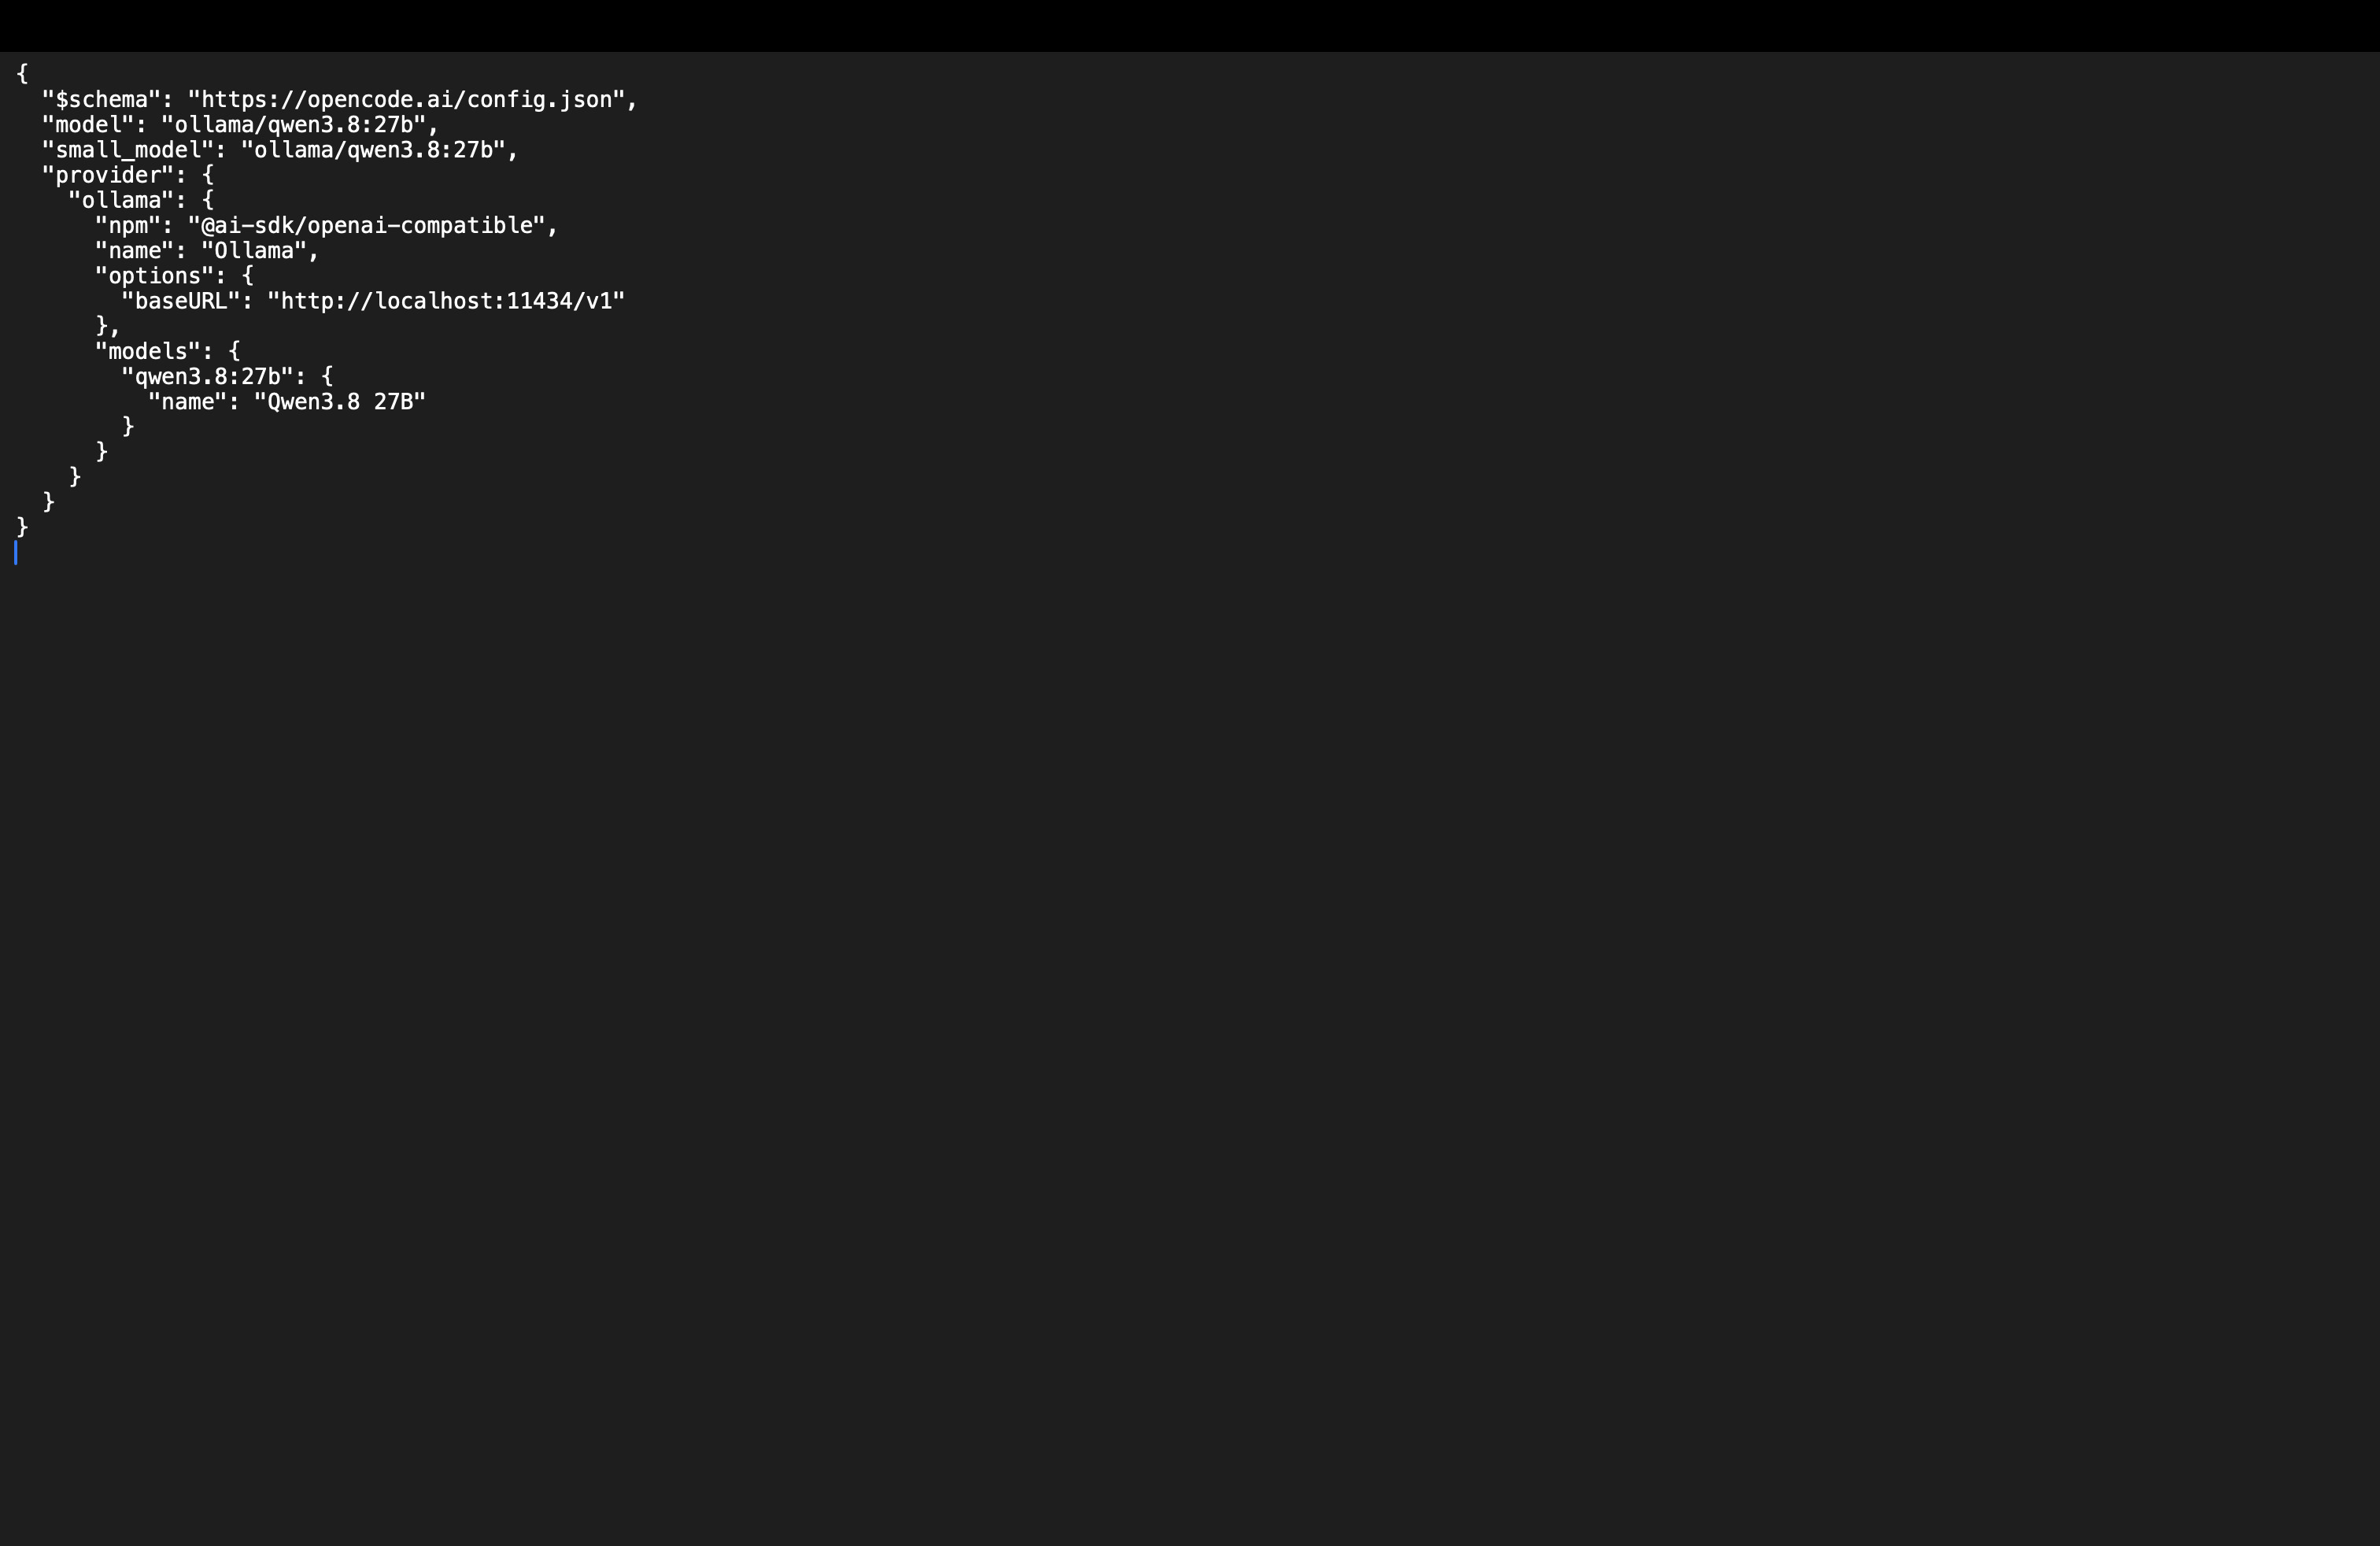
To view the saved configuration again in a text editor, run this from the project folder:
open -t ./opencode.json
5. Check the service and model
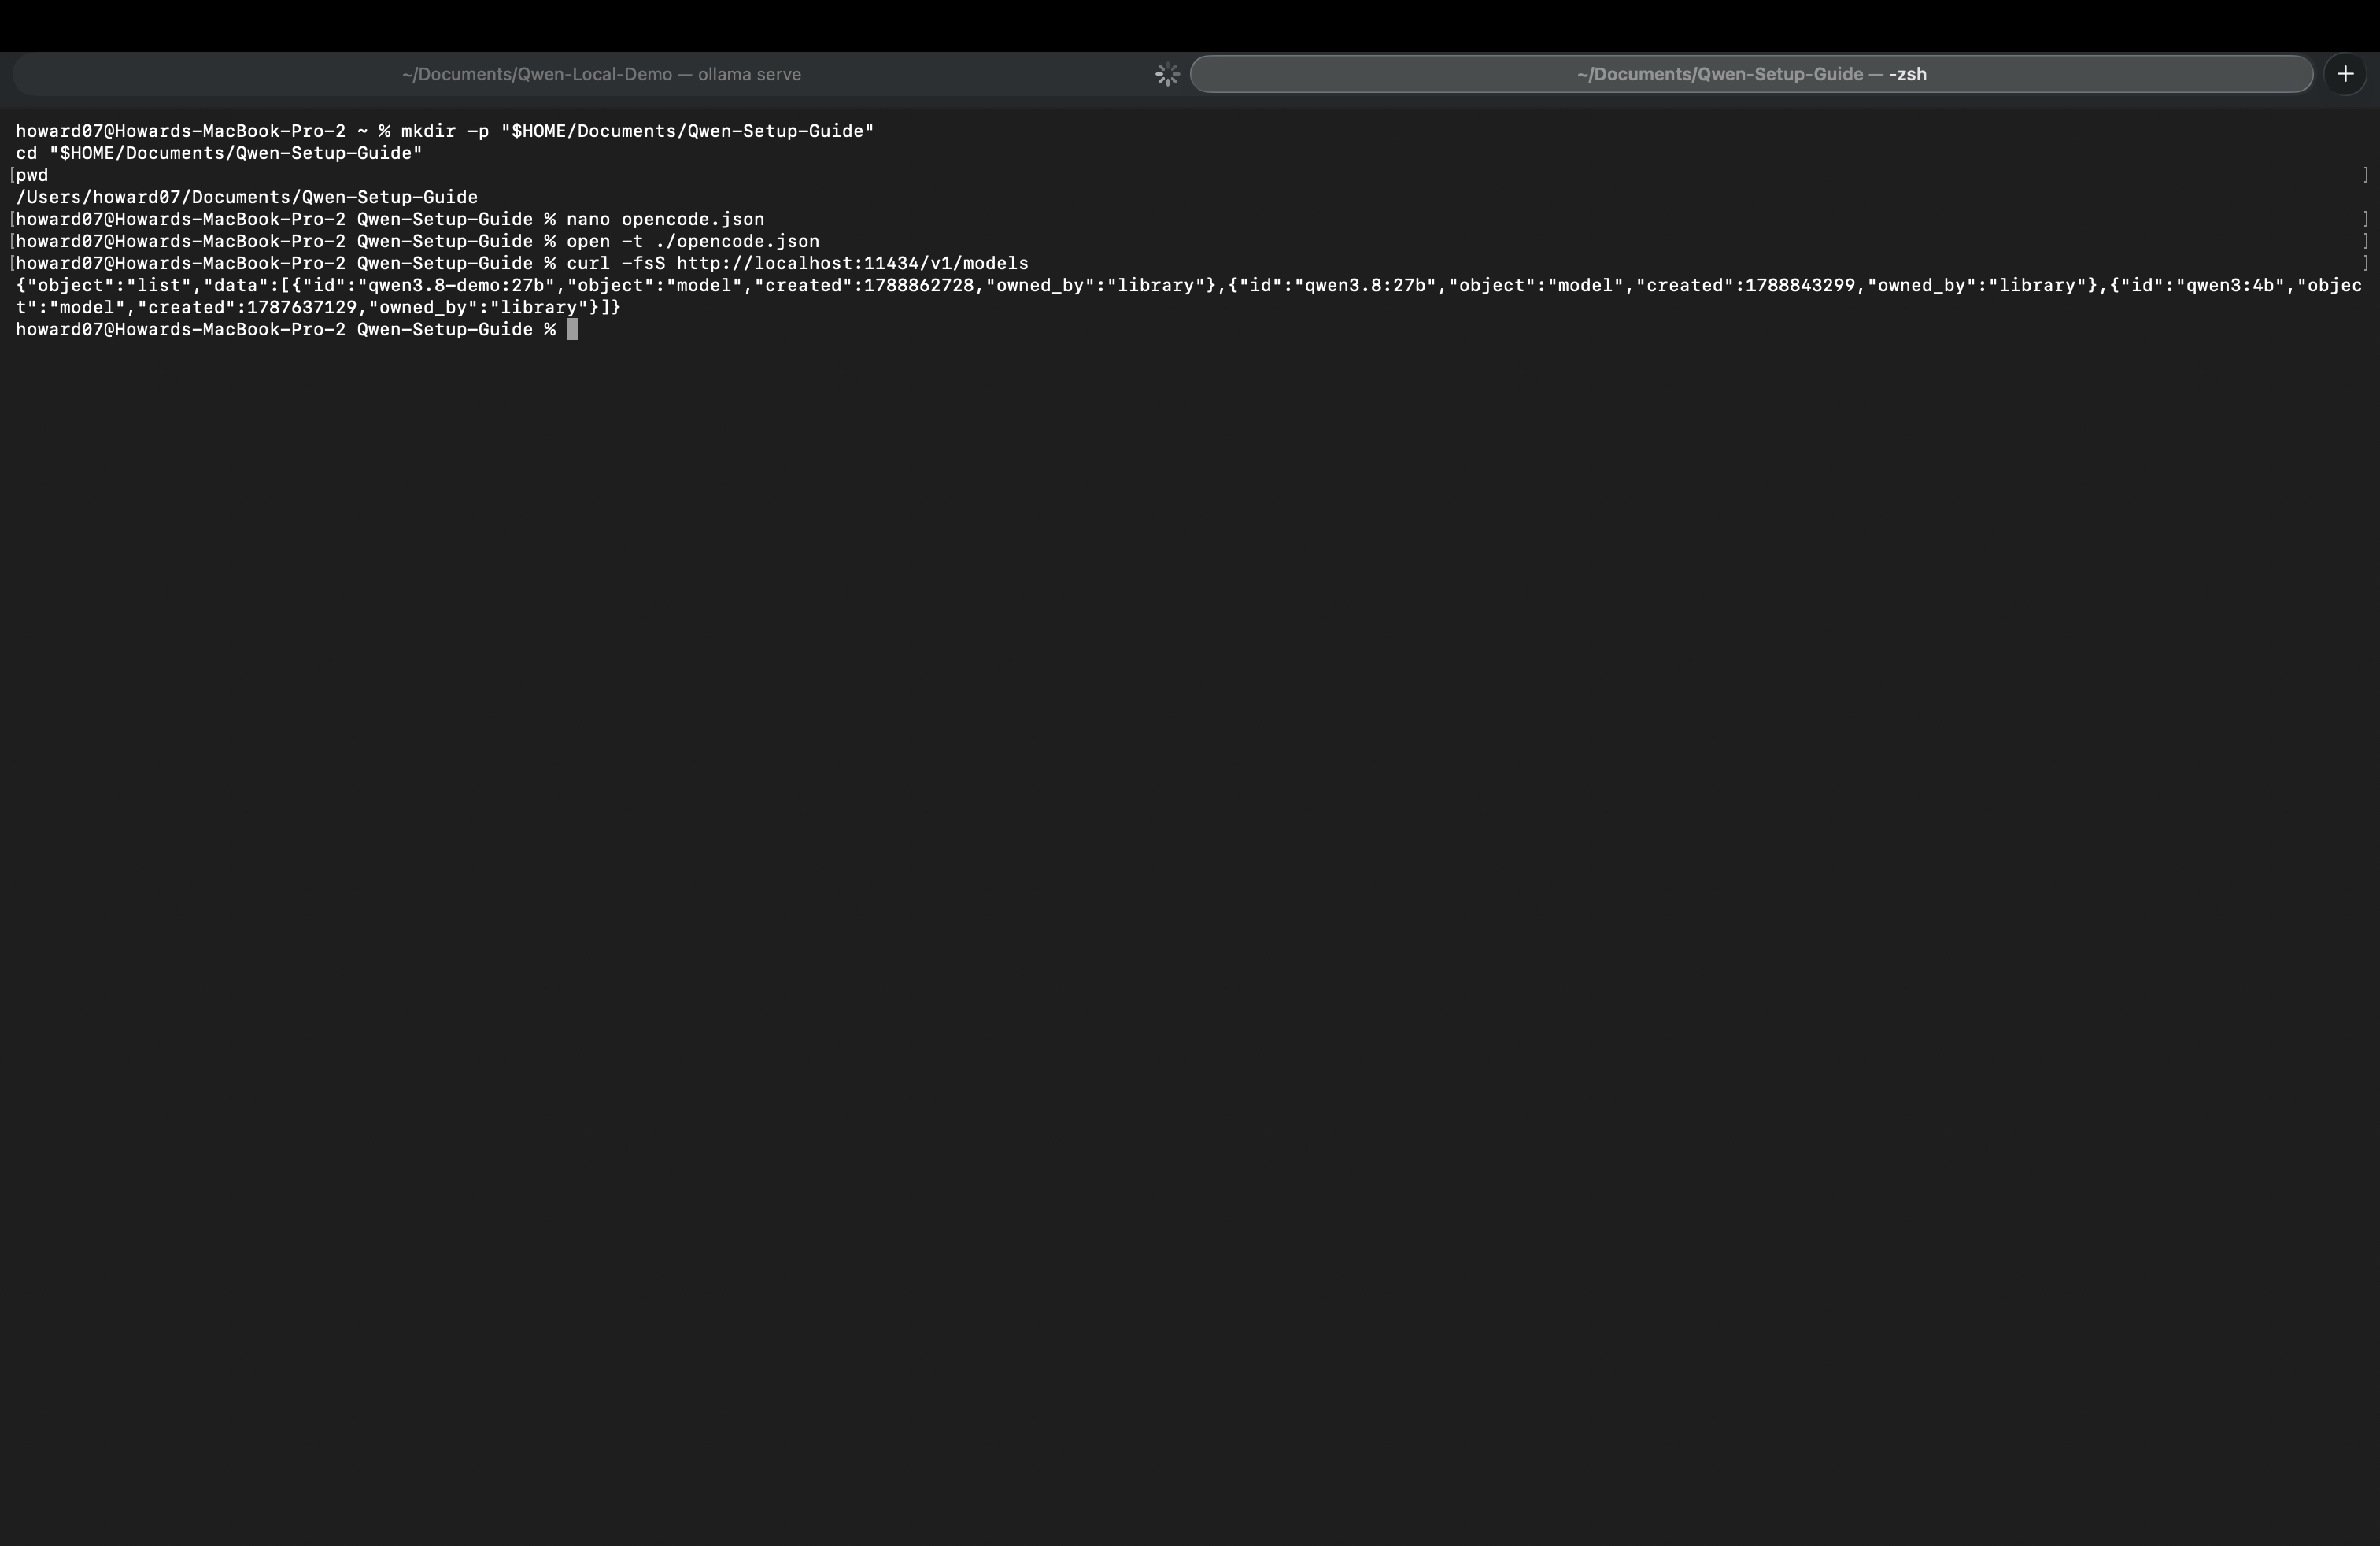
Run this in Terminal:
curl -fsS http://localhost:11434/v1/models
The returned model list should include qwen3.8:27b. If the connection fails, check that Ollama is running. If the model is missing, check that the download finished.
Manual setup is now complete; you do not need to repeat Path 2. Continue to “Select the local model in OpenCode.”
Path 2: Let AI help with setup
Use an AI agent that can respond normally, read and write local files, and run commands. A chat-only assistant without access to your computer cannot perform these actions for you. If you use OpenCode for setup, select an already working model, not the local Qwen model you have yet to configure.
- Open the project folder where you want to store the configuration in your AI assistant and confirm its working directory.
- Send the prompt below and approve the operations needed for this setup.
- Wait for actual check results. Complete any Ollama application settings the assistant asks you to adjust. Resolve failed checks before continuing.
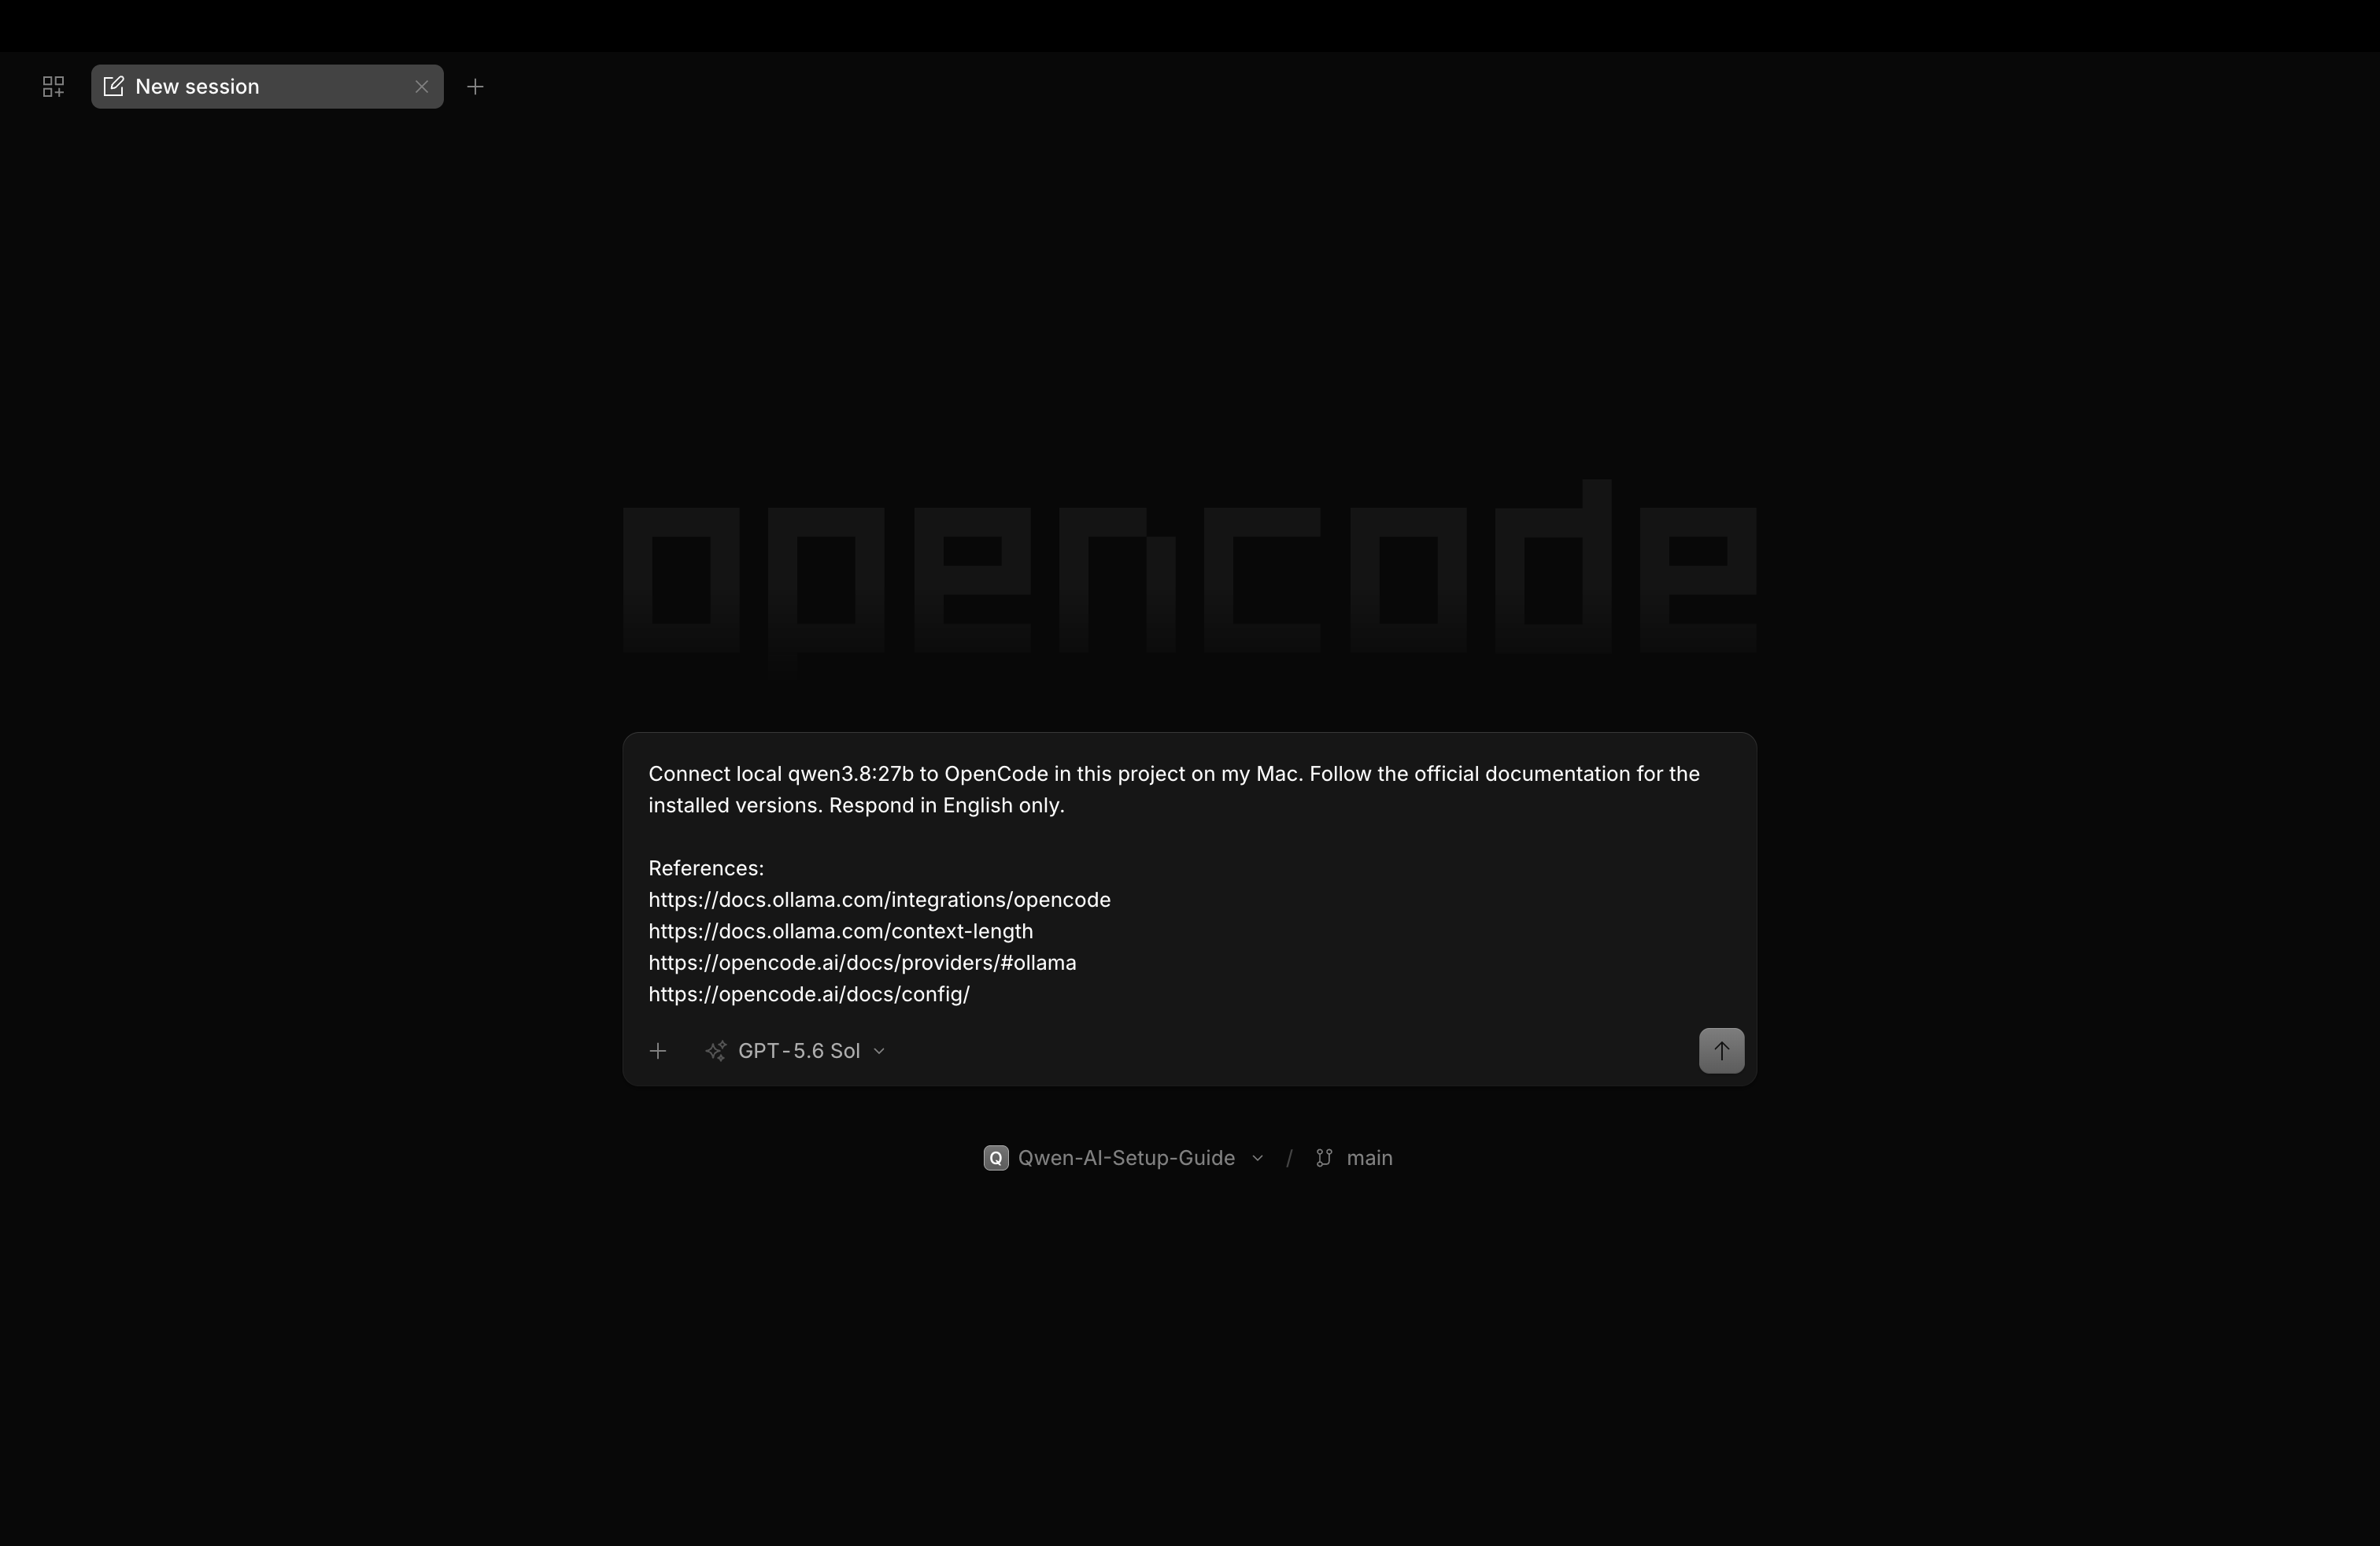
Follow the official Ollama and OpenCode documentation to connect local qwen3.8:27b to OpenCode on this Mac. Check the installed OpenCode version first and use its documented configuration format rather than mixing syntax from different versions.

References:
https://docs.ollama.com/integrations/opencode
https://docs.ollama.com/context-length
https://opencode.ai/docs/providers/#ollama
https://opencode.ai/docs/config/

Ollama, OpenCode, and ego (lite) are installed. Complete these steps:

1. Confirm the absolute path of the current project folder. Before editing, inspect and back up any existing opencode.json or opencode.jsonc. Preserve unrelated settings, do not create conflicting configuration files, and do not change global OpenCode configuration.
2. Check the Ollama service and ollama list. If qwen3.8:27b is missing, explain the approximately 18 GB download and storage requirements, then get my confirmation before running ollama pull qwen3.8:27b. Do not create a recording-specific alias or Modelfile.
3. Set at least 64k context using the official instructions. For the Ollama application, guide me through its settings. For a CLI-only installation, you may start OLLAMA_CONTEXT_LENGTH=65536 ollama serve after I confirm. Do not terminate an existing service without permission or start a conflicting second service.
4. Use the official Ollama provider format in the project: provider ID ollama, npm @ai-sdk/openai-compatible, name Ollama, options.baseURL http://localhost:11434/v1, and model qwen3.8:27b with name Qwen3.8 27B. Set model and small_model to ollama/qwen3.8:27b. Do not add cloud API keys, custom sampling parameters, reasoning toggles, or output limits.
5. Validate the configuration syntax and check that http://localhost:11434/v1/models includes qwen3.8:27b. If the OpenCode CLI is available, run opencode models ollama from the project folder and check that it recognizes ollama/qwen3.8:27b. If an existing provider restriction prevents loading, explain the conflict and ask me before changing it.
6. Report the changed file paths, actual check results, remaining actions for me, and the folder I should open in OpenCode. If the model has not loaded, do not claim its runtime context has been verified; explain how to check it with ollama ps once it runs. Do not submit a browser task for me.
Select the local model in OpenCode
After completing either path:
-
Confirm that the configuration is saved. Fully quit and restart OpenCode if it is already running.
-
Use OpenCode Desktop's open-project action to select the entire folder containing
opencode.json. For example, selectQwen-Setup-Guidein Documents, not the JSON file on its own. -
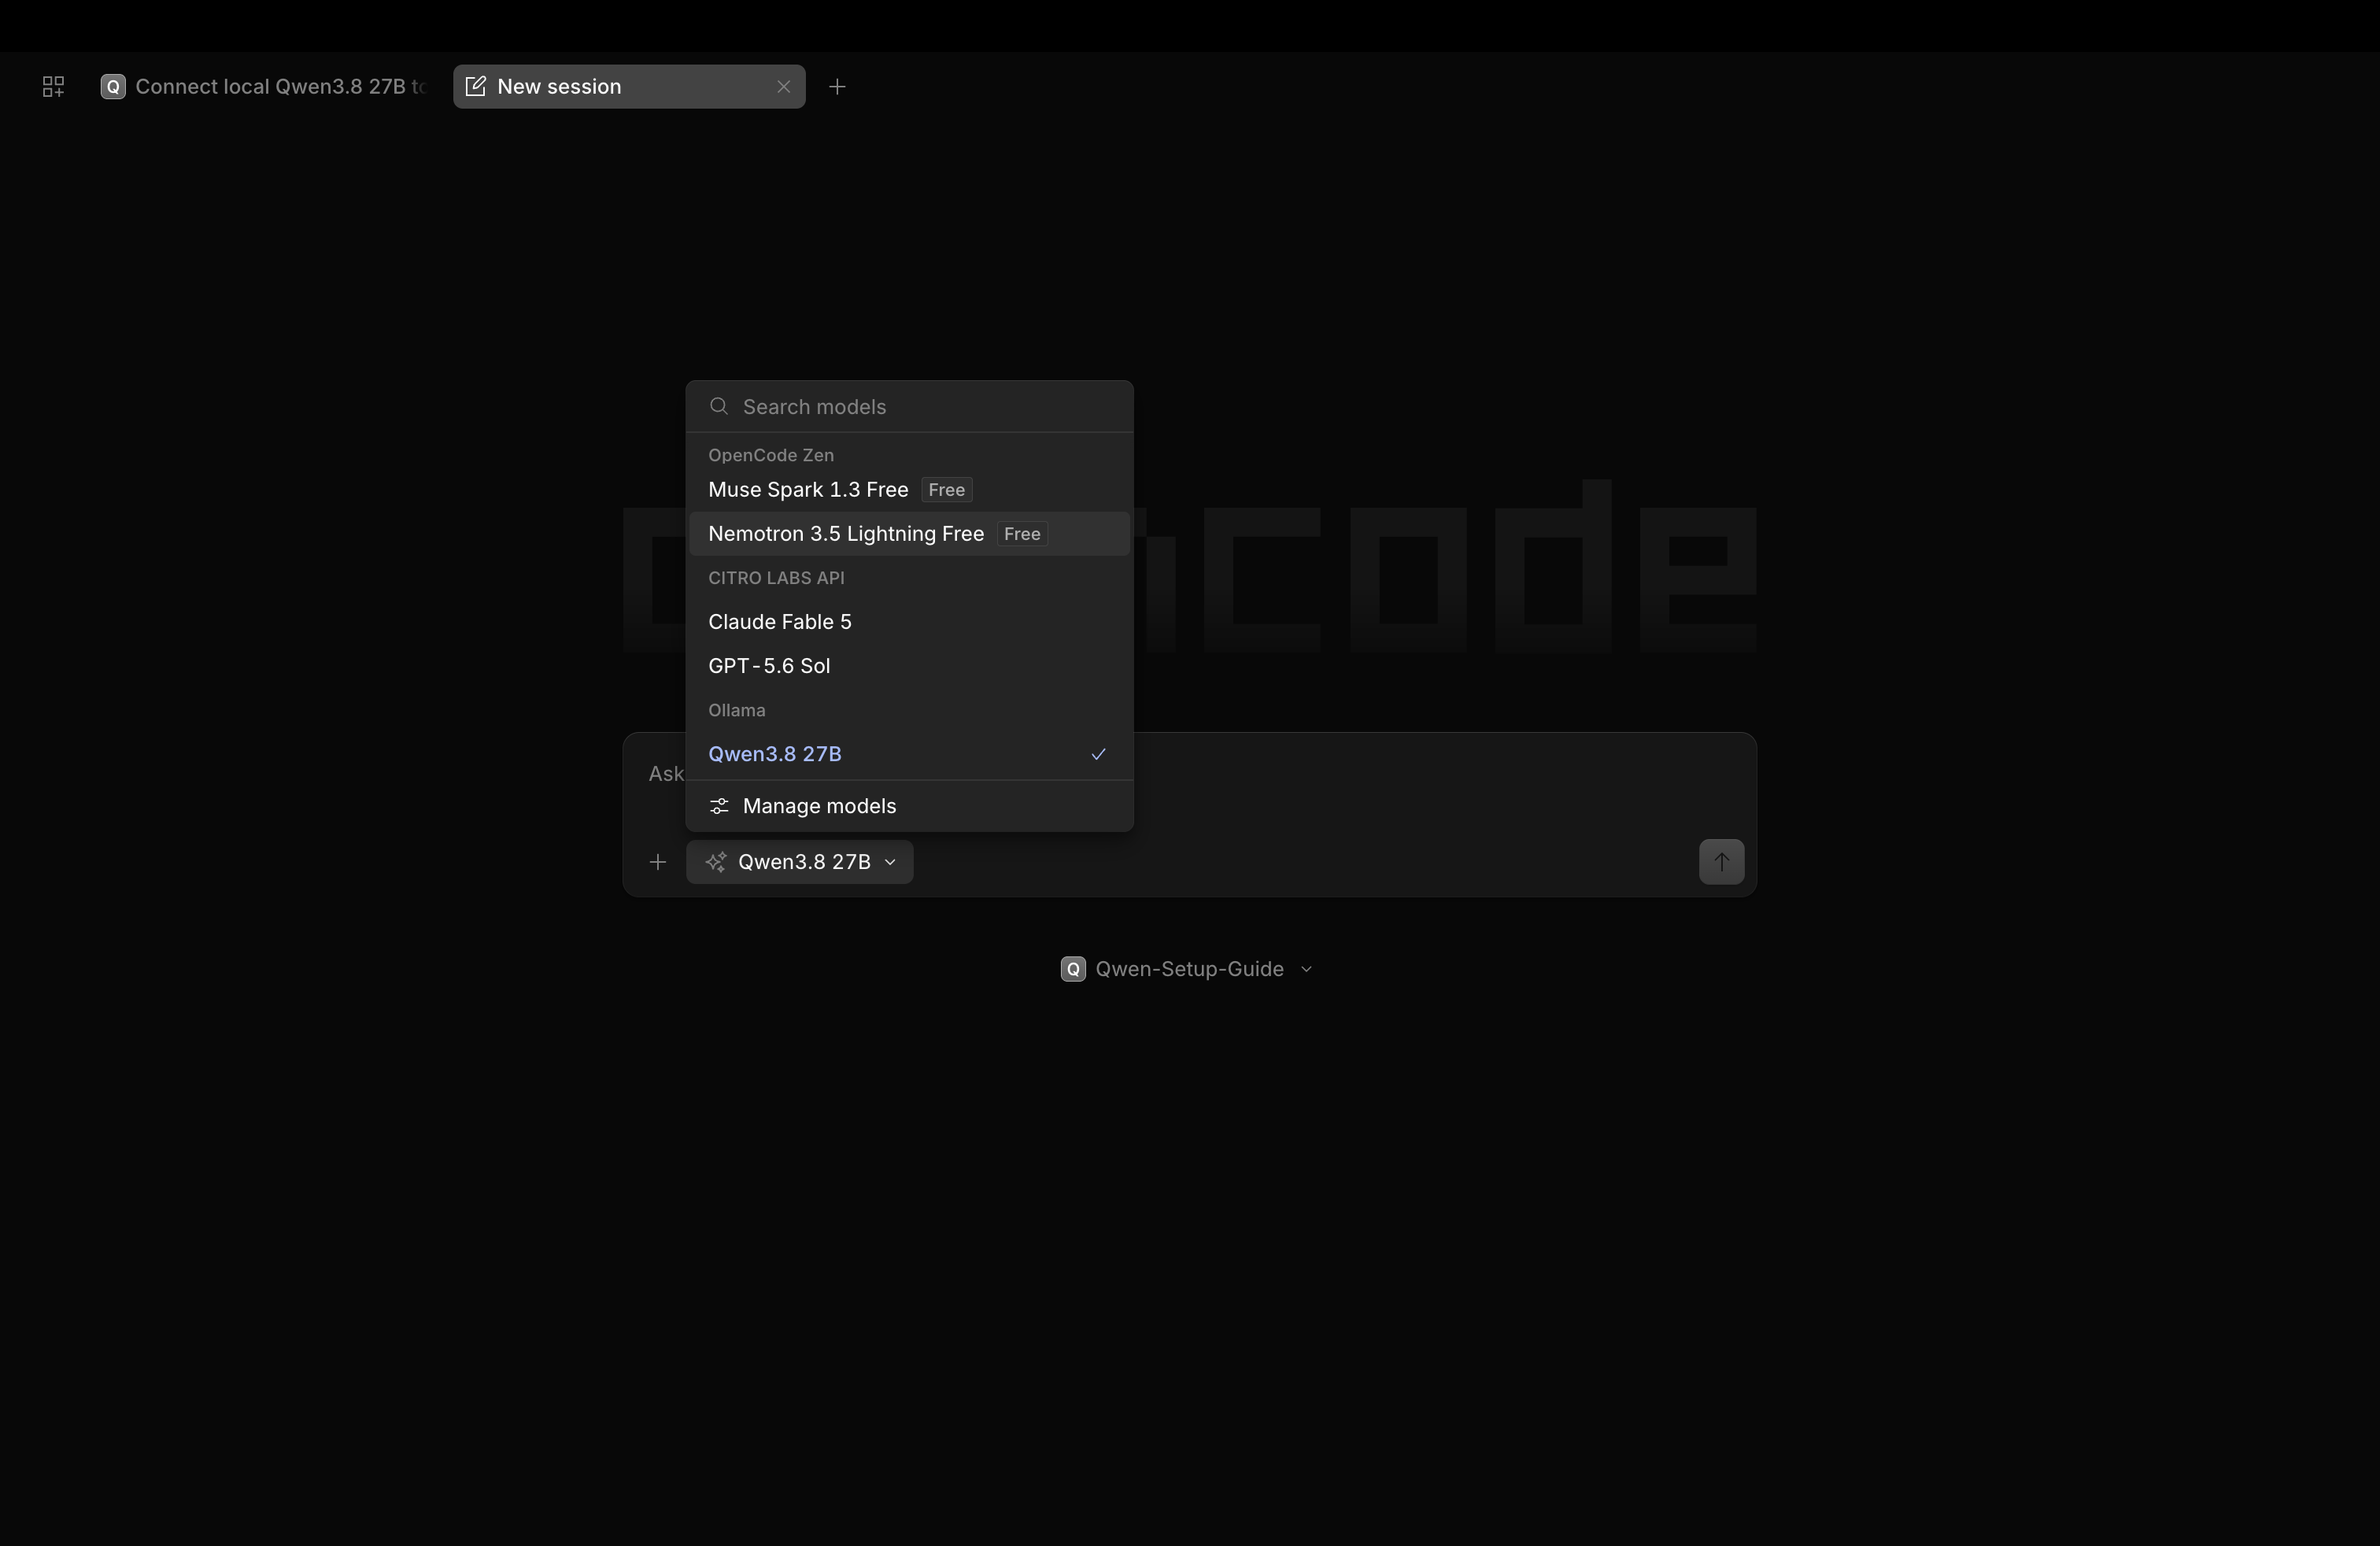
Click the model menu below the chat input and select Qwen3.8 27B under Ollama. This is the display name in the configuration above.
-
For the TUI, enter the same project folder in Terminal and run the launch command in Step 1. Keep Ollama running throughout the task in either interface.
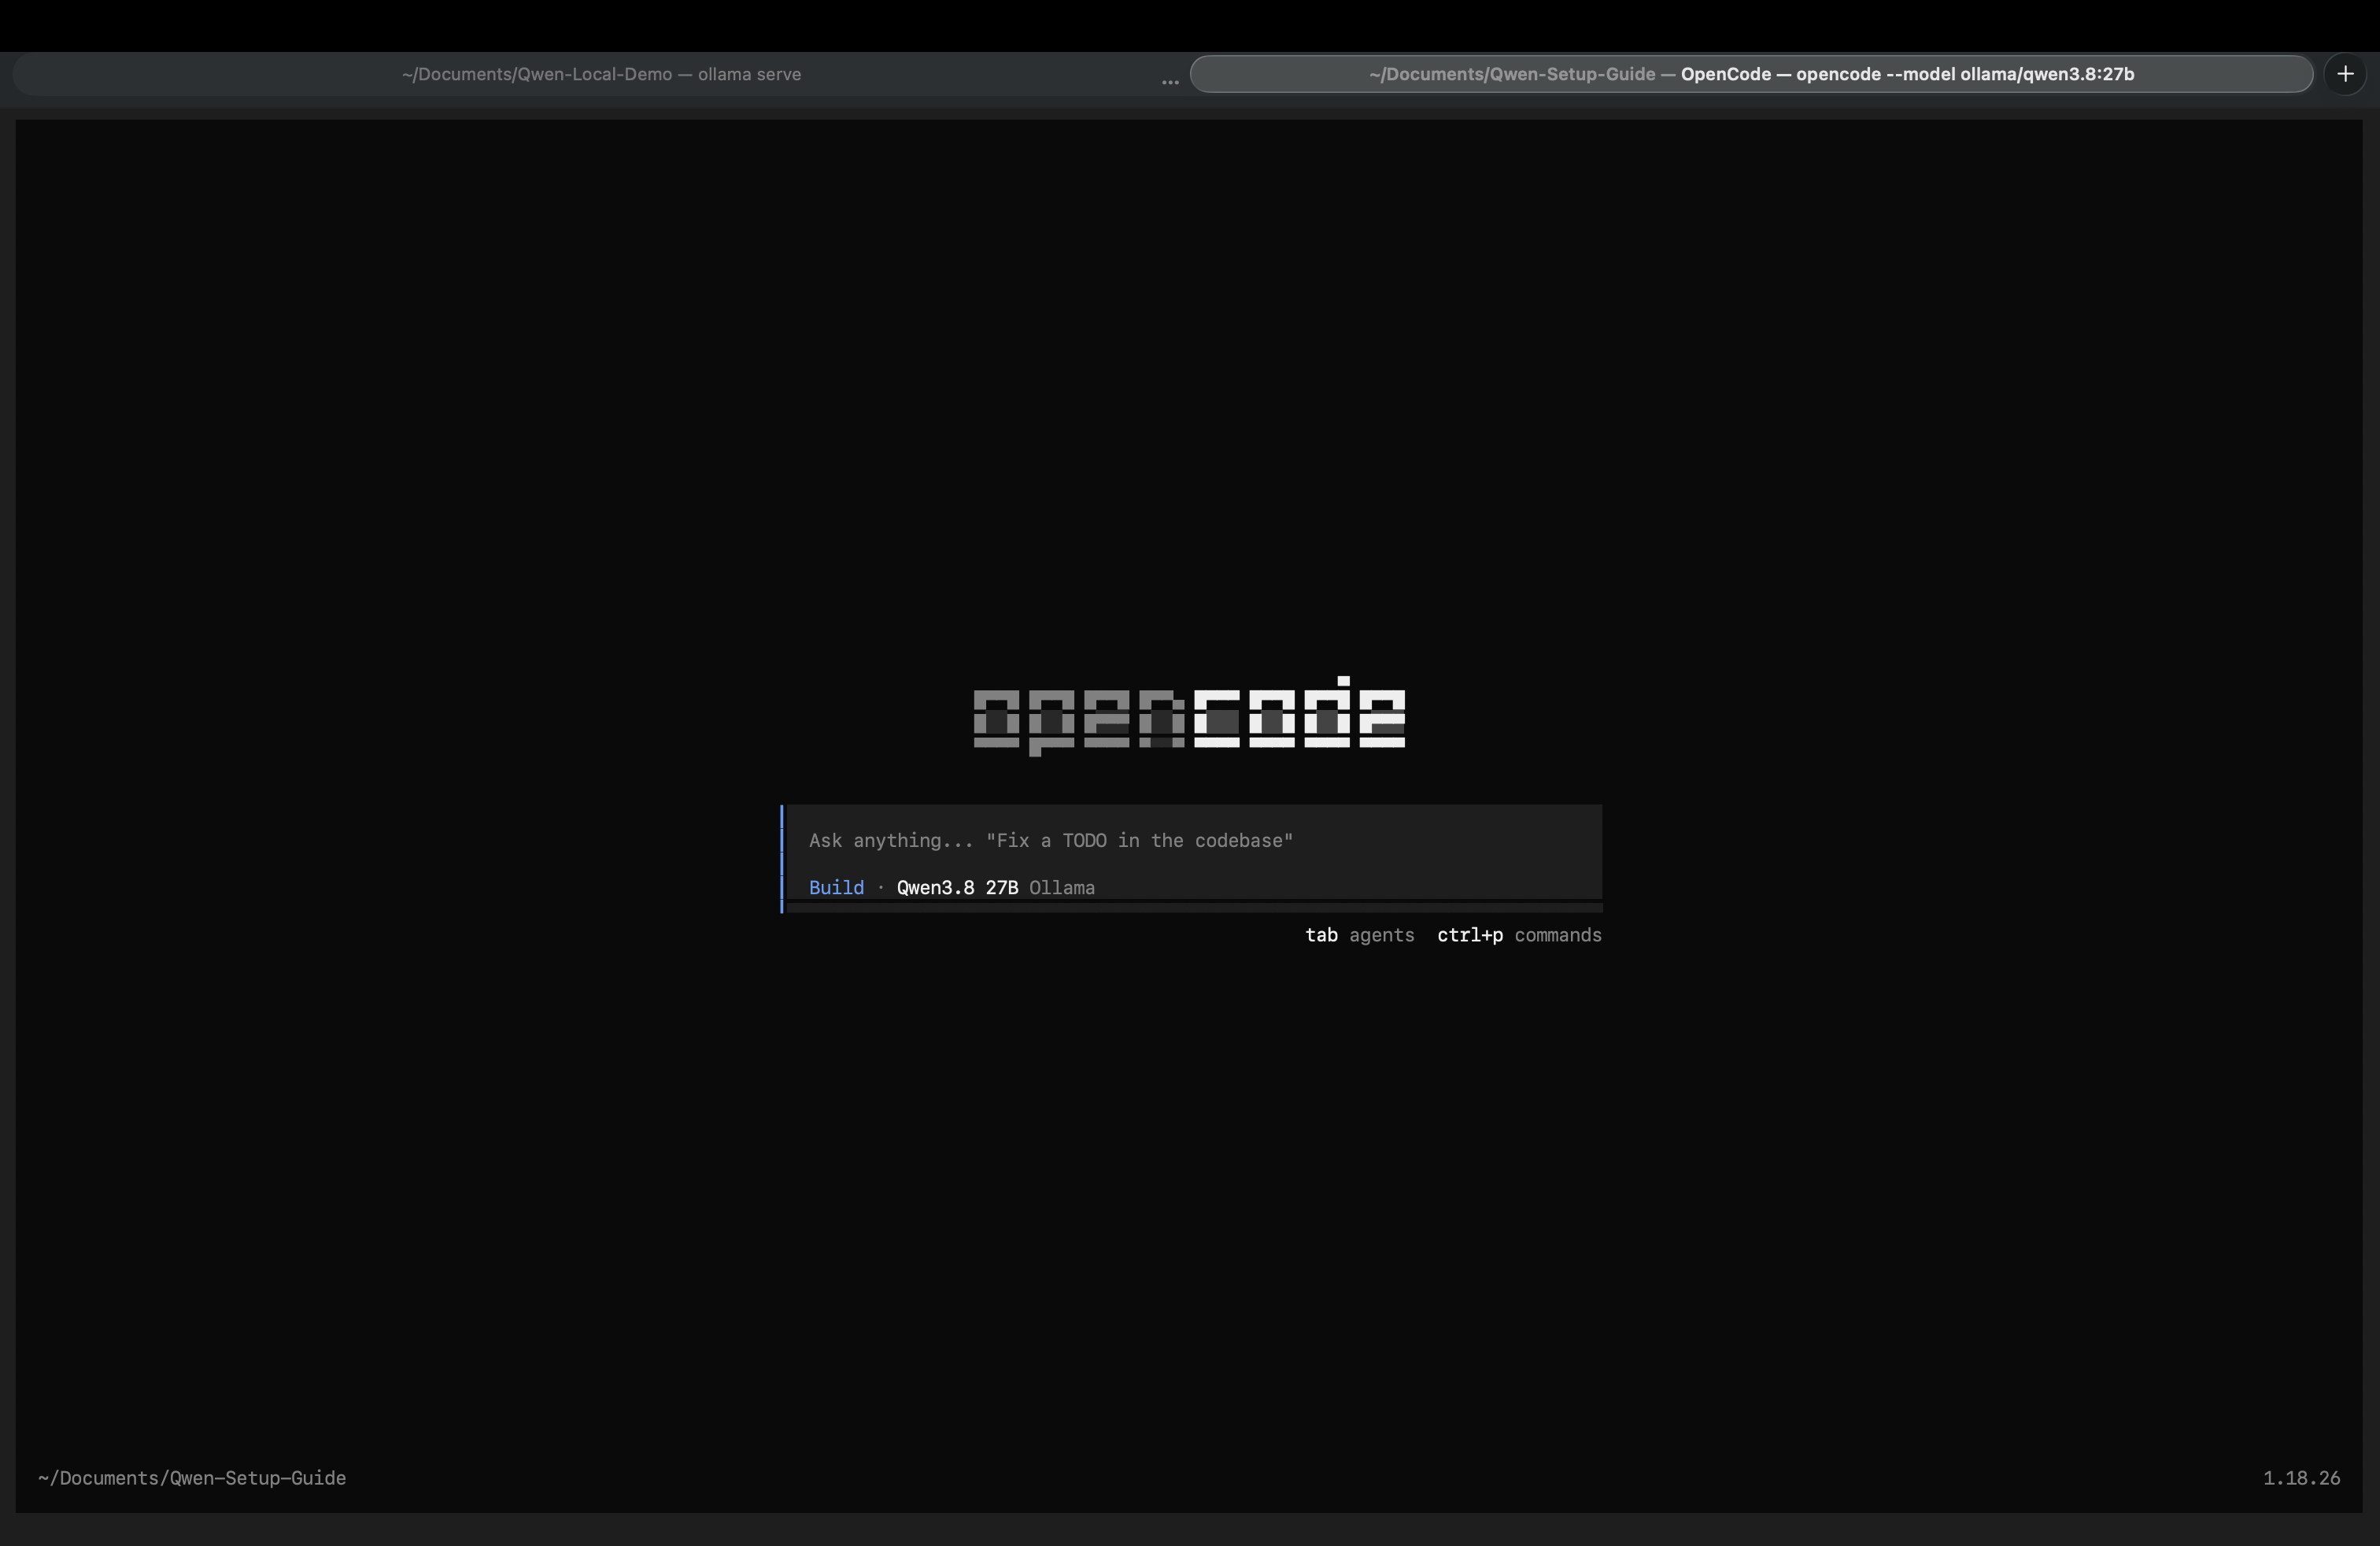
Once the model is running, use ollama ps in another terminal to check that its CONTEXT reaches 64k. If the model is absent, it has not loaded or has been unloaded; its runtime context cannot be confirmed from that output.
For TUI-only use, Ollama also provides an official quick launch: ollama launch opencode --model qwen3.8:27b. It supplies configuration to the launched process; it does not mean a project configuration has been saved for Desktop. This tutorial keeps the project configuration above so Desktop and the TUI can use the same project.
Step 1: Enable auto-accept permissions
Desktop
Open Settings > General and turn on Auto-accept permissions, as shown in the recording.
TUI
From the project folder, start OpenCode with the local model and auto-approve enabled:
opencode --auto --model ollama/qwen3.8:27b
Step 2: Load the ego-browser skill
Desktop
Start a new session, enter /ego-browser, and select ego-browser from the list. Submit the skill as a separate message, then send the browser task.
TUI
In the TUI, select the local Qwen3.8 27B model, paste the following prompt into the input field, and submit it. The prompt specifies ego-browser, so you do not need to enter a slash command first:
Use ego-browser to collect the first five posts from Anthropic's official X profile.
Check that OpenCode loads the skill before starting browser commands. If it cannot find it, finish ego (lite) onboarding and fully restart OpenCode.
Step 3: Let the local model work through OpenCode
Give the task to OpenCode. The agent will use ego-browser to open Anthropic's X profile in ego (lite), read the requested posts, and organize the results in the OpenCode conversation.
Desktop and the TUI follow the same process. Once you submit the task, the agent handles the remaining browser actions through ego (lite).
Step 4: Review progress and check the result
When the task finishes, OpenCode returns the five posts with their visible details, direct links, and a short summary of each post. Anthropic's X profile remains open in ego (lite), and the browser task is complete.
Troubleshooting
The local model does not appear or cannot connect
Check that Ollama is running and ollama list includes qwen3.8:27b. Open the project containing opencode.json, confirm the local endpoint, and fully restart OpenCode after changing its configuration.
The model responds, but the browser does not move
Confirm that OpenCode loaded ego-browser and is issuing tool calls, rather than only describing actions. Check auto-approve settings and local command access. Generating text alone does not demonstrate browser control.
The task is slow or stops partway through
Local generation speed depends on hardware, available memory, and context length. Close unnecessary memory-heavy applications and try a smaller task, such as reading one post. If OpenCode reports an error or stops responding, inspect that message before retrying.
Go deeper
- OpenCode: the general Desktop and TUI browser workflow
- Your own Agent Harness: distinguish local execution from approval bypass
- ego-browser: browser helper commands
- OpenCode providers: the Ollama provider configuration
- OpenCode permissions: auto-approve behavior and explicit deny rules